Reliable Plumbing Solutions for Residential and Commercial Properties
Essential Plumbing Services for Water Quality Management
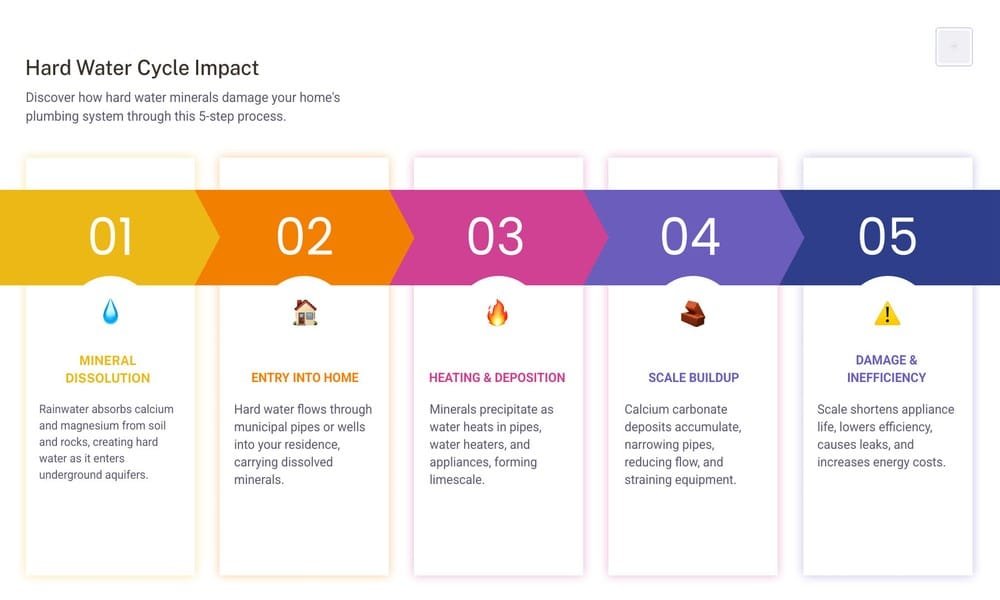
Understanding your home’s water quality is the first step toward effective water management. Hard water, characterized by elevated levels of dissolved minerals like calcium and magnesium, can significantly impact your plumbing system and daily life. These minerals, while not typically harmful to health, can lead to a host of problems including unsightly soap scum, mineral deposits on fixtures, reduced appliance efficiency, and even shortened appliance lifespans. For homeowners experiencing these issues, addressing water hardness is a crucial aspect of maintaining a healthy and efficient home.
The most reliable way to determine if you need a water softener is by testing your water hardness. This can be done through various methods: obtaining a water quality report from your local utility provider, using readily available DIY test kits, or sending a water sample to a certified laboratory for precise analysis. Water hardness is commonly measured in grains per gallon (GPG) or milligrams per liter (mg/L). Generally, water hardness exceeding 7 GPG is considered hard enough to warrant treatment.
Implementing solutions to mitigate hard water goes beyond mere convenience; it’s an investment in your home’s infrastructure. Softening your water can prevent scale buildup in pipes and water heaters, ensuring plumbing longevity and consistent water flow. It can also improve the effectiveness of soaps and detergents, leading to cleaner dishes, softer laundry, and a more pleasant bathing experience. For comprehensive solutions tailored to your home’s needs, exploring professional Holloway plumbing and water softeners can provide the expert guidance and installation required.
Assessing Household Needs for Plumbing Services
Choosing the right water softener system involves more than just identifying hard water. Proper sizing is critical to ensure your system can effectively meet your household’s demands without overworking or underperforming. This assessment typically involves considering your household size, average daily water consumption, and the specific hardness level of your water.
A good rule of thumb is that the average person uses about 75 gallons of water per day. Therefore, a family of three would consume approximately 225 gallons daily. To calculate the appropriate grain capacity for a water softener, you multiply your daily water usage by your water hardness in GPG. For instance, a family of four, known to use a significant amount of water, should generally opt for a water softener with a minimum capacity of 33,000 grains per gallon (GPG) to ensure adequate softening capacity. This calculation helps determine how frequently the system will need to regenerate, impacting salt usage and overall efficiency. Furthermore, considering peak demand flow rates is essential to ensure your system can deliver soft water even during periods of high usage, such as multiple showers running simultaneously.
Professional Standards in Plumbing Services
While the idea of a DIY installation might be appealing for cost savings, the complexity of a whole-house water softener installation often necessitates professional expertise. Adhering to professional standards ensures not only the correct functioning of your system but also compliance with local building codes and regulations. Licensed plumbers are knowledgeable about specific permit requirements and backflow prevention devices that might be mandated in your area, preventing potential legal issues or safety hazards.
Professional installers also carry the necessary insurance, protecting you from liability in case of accidents or damage during the installation process. Their experience allows them to properly assess your existing plumbing, recommend the most suitable system, and ensure a leak-free, efficient setup. For reliable and compliant water softener installations, turning to trusted experts like Holloway plumbing and water softeners ensures peace of mind and long-term performance.
Selecting and Sizing Residential Water Softener Systems
The market offers a variety of water softener systems, each designed to address hard water in slightly different ways. Understanding the main types and how they work is crucial for selecting the best fit for your home.
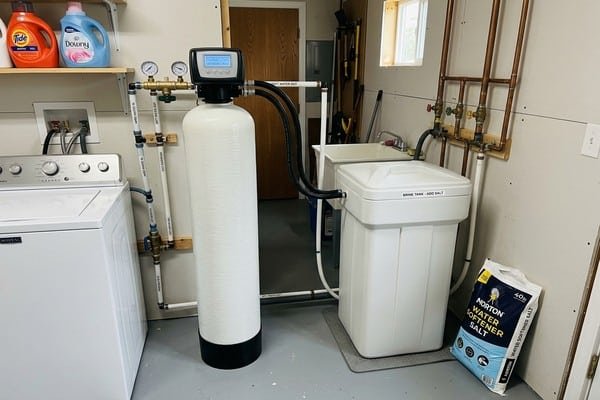
The most common type is the salt-based water softener, which operates on an ion exchange principle. Inside the softener’s resin tank, tiny resin beads are coated with sodium ions. As hard water passes through, the calcium and magnesium ions (which cause hardness) are attracted to the resin beads and “exchanged” for sodium ions. Once the resin beads are saturated with hard minerals, the system undergoes a regeneration cycle, flushing the minerals away with a brine (saltwater) solution from a separate brine tank. Salt-based softeners are highly effective at removing hardness, and for most homes, they typically require recharging about once a week.
Salt-free water conditioners, often marketed as “salt-free softeners,” work differently. Instead of removing minerals, they condition them using technologies like Template Assisted Crystallization (TAC) or magnetic descalers. These systems alter the molecular structure of hardness minerals, preventing them from sticking to surfaces and forming scale. While they don’t technically “soften” the water by removing minerals, they can be effective at scale prevention and require less maintenance as they don’t need salt or a drain line for regeneration. However, their effectiveness can vary depending on water hardness levels and specific mineral composition.
For homes with high water usage or very hard water, dual-tank systems offer continuous soft water. These systems have two resin tanks, allowing one to regenerate while the other continues to soften water, ensuring uninterrupted supply. When considering the type of salt for regeneration, homeowners can choose between sodium chloride (common water softener salt) or potassium chloride. Potassium chloride is a salt alternative for those concerned about sodium intake or environmental discharge, though it is generally more expensive. Environmental regulations regarding brine discharge can vary by location, so it’s wise to check local guidelines.
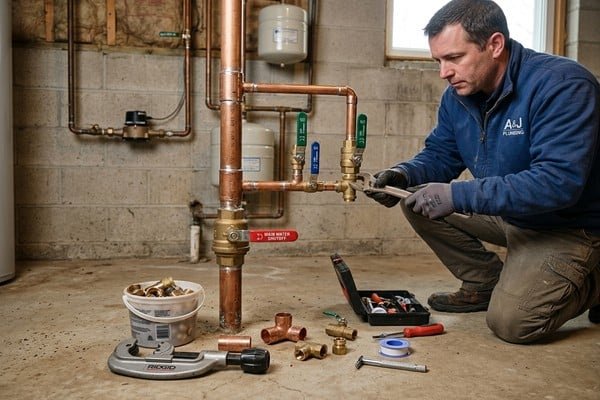
Technical Guide for a Residential Water Softener Install
Installing a residential water softener, while a significant undertaking, is a manageable project for those with moderate plumbing skills. The process typically takes 2-4 hours for professionals, but a DIYer should allocate a full day for preparation and execution. The ideal location for installation is near the main water line entry point, after the main shutoff valve but before your water heater. This ensures all incoming water is softened and protects your water heater from scale buildup, extending its lifespan. It’s also crucial to avoid installing the softener after any outdoor faucets if you plan to use hard water for irrigation, as softened water can be detrimental to some plants.
Before starting, gather your tools and materials. You’ll need pipe cutters, wrenches, plumber’s tape, a level, measuring tape, and potentially soldering equipment if working with copper pipes, or push-to-connect fittings (like SharkBite) for easier connections with PEX or copper. You’ll also need flexible supply lines, a drain line, and an air gap fitting for the drain. A grounded 120V electrical outlet must be within reach for the control valve.
Preparation Steps:
- Test Your Water: Confirm your water hardness to properly program the unit later.
- Choose Location: Ensure a level surface, access to power, and a drain within 30 feet.
- Shut Off Water: Turn off the main water supply to your home.
- Drain Lines: Open faucets throughout the house to relieve pressure and drain water from the pipes.
- Turn Off Water Heater: For safety, turn off the power or gas supply to your water heater.
Installation Steps (Simplified):
- Install Bypass Valve: Many modern softeners come with a bypass valve. If not, install one. This allows you to isolate the softener for maintenance without shutting off your home’s entire water supply.
- Cut Main Water Line: Carefully cut into the main cold water line at the chosen installation point. This Old House offers a helpful visual guide for this critical step: How To Install a Whole-House Water Softener.
- Connect Softener: Use flexible supply lines to connect the main water line to the softener’s inlet and outlet ports, ensuring correct flow direction (usually indicated by arrows). Tighten connections securely but avoid over-tightening.
- Connect Brine Tank: Attach the small tubing from the softener’s control head to the brine tank, following manufacturer instructions.
- Connect Drain Line: Run a drain line from the softener’s control valve to a nearby drain (e.g., floor drain, utility sink). Crucially, incorporate an air gap fitting into the drain line. This prevents wastewater from being siphoned back into your potable water supply, a requirement in many local plumbing codes.
- Add Salt (Initial): Add a few gallons of water to the brine tank, then fill it with water softener salt.
- Restore Water: Slowly turn the main water supply back on, checking for leaks at all connections.
- Program Unit: Proceed to program the control valve.
For more detailed, step-by-step instructions, resources like How to Install a Water Softener in Your Home in 13 Steps can be invaluable for the DIY enthusiast.
Programming and Control Valve Setup
Once the physical installation is complete, programming the control valve is the next crucial step. This valve manages the softener’s regeneration cycles, which are essential for its continuous operation. You’ll typically need to input your water hardness level (in GPG), the number of people in your household, and the time of day you prefer regeneration to occur (often overnight, when water usage is minimal).
Modern softeners often feature metered regeneration, meaning they regenerate based on actual water usage rather than a fixed schedule (timed regeneration). This more efficient approach conserves salt and water. You’ll also set the backwash duration, which is part of the regeneration process that cleans the resin bed. Many units include salt level alerts to remind you when to refill the brine tank. During the initial startup procedure, the system will often purge air from the tanks and perform a preliminary backwash and rinse cycle to prepare the resin for softening. Always refer to your specific manufacturer’s manual for precise programming instructions.
Professional vs. DIY: Cost Analysis and Risk Assessment
Deciding whether to install a water softener yourself or hire a professional involves weighing costs against potential risks and complexities. The average cost of water softener installation is around $1,500, but this can range significantly from $200 for a basic DIY setup to $6,000 or more for complex professional installations involving high-capacity systems or extensive plumbing modifications. This range accounts for the cost of the unit itself, labor rates, and any additional materials or services required.
DIY Installation:
- Pros: Significant cost savings on labor, which can be $150-$1,000+ depending on your region. A sense of accomplishment.
- Cons: Requires a good understanding of plumbing, specific tools, and the ability to troubleshoot. Risks include plumbing errors leading to leaks or even significant water damage (flood risks), voiding the manufacturer’s warranty due to improper installation, and the potential for incorrect sizing or programming, which reduces efficiency. The initial investment in tools might also offset some savings.
Professional Installation:
- Pros: Expertise ensures correct sizing, optimal placement, and adherence to all local codes. Reduces the risk of leaks, damage, and warranty issues. Professionals can often complete the job much faster (typically 2-4 hours). They also handle the disposal of old units and can offer valuable advice on maintenance.
- Cons: Higher upfront cost due to labor.
For those considering a DIY approach, it’s important to honestly assess your skill level. If cutting into your main water line and making watertight connections makes you uneasy, or if your home has complex plumbing, hiring a professional is often the safer and more reliable choice. For expert guidance and seamless integration of your new system, consider reaching out to specialists in Home Plumbing Installation.
Post-Installation Maintenance and System Longevity
Once your residential water softener is installed and running, routine maintenance is key to ensuring its longevity and optimal performance. Water softeners typically last 10-15 years with proper care, and some high-quality units can even exceed this.
The most frequent maintenance task is salt refills. You should check your brine tank monthly and refill it when the salt level drops below one-quarter full. It’s important to use high-quality water softener salt (pellets or crystals) and avoid rock salt, which can contain impurities. Occasionally, you might encounter a “salt bridge,” where salt hardens into a crust that prevents it from dissolving properly. If this happens, carefully break up the bridge with a broom handle or similar tool.
Resin cleaning is another important aspect. Over time, the resin beads can become fouled with iron or other contaminants, reducing their effectiveness. Many manufacturers recommend using a resin cleaner periodically, usually every few months, to maintain the resin’s capacity. Additionally, an annual inspection by a plumbing professional can help identify and address potential issues before they become major problems.
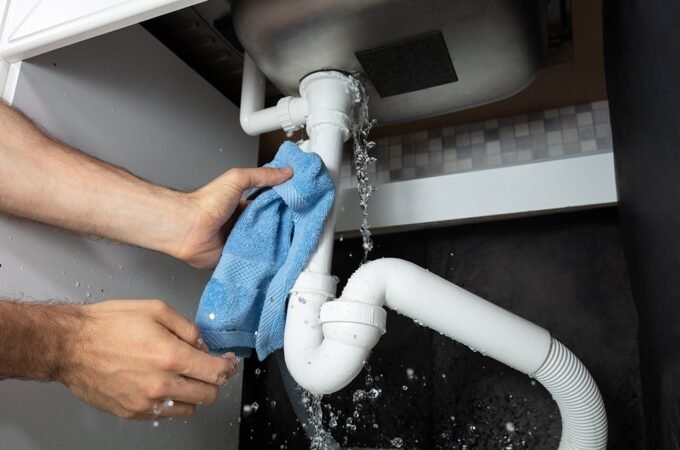
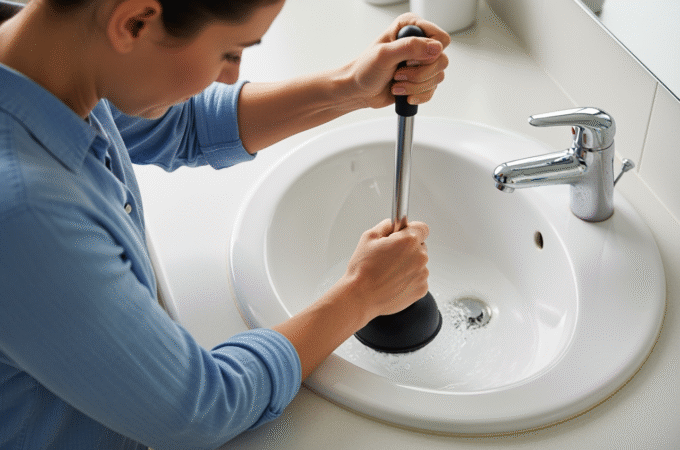
Common installation mistakes to avoid include incorrect pipe connections, which can lead to leaks, or improper drain line setup, potentially causing backflow issues. If you notice leaks after installation, immediately shut off the water supply and check all connections, ensuring they are tight and sealed with plumber’s tape. Pressure drops can indicate a clogged filter or an issue with the softener’s bypass valve. For any concerns regarding your home’s Water Quality or the performance of your water softener, professional assistance is always recommended.
Frequently Asked Questions about Water Softeners
How do I know if my water is hard enough to require a softener?
The clearest indicators of hard water are visible signs around your home: soap scum buildup on shower doors and tiles, white crusty deposits on faucets and showerheads, and mineral spotting on dishes and glassware. You might also notice your skin feeling dry or your hair being dull after showering. Scientifically, water hardness is measured in grains per gallon (GPG). If your water tests above 7 GPG, it’s generally considered hard enough to benefit significantly from a water softener.
Can I install a water softener if I have a private well?
Absolutely. Homes with private wells often have even harder water than municipal supplies, frequently containing higher levels of iron and other minerals. Water softeners are highly effective in these situations. For wells with significant iron content, a system designed for iron reduction or a dual-tank system is often recommended. Dual-tank systems are particularly beneficial as they provide continuous soft water, ensuring one tank is always online while the other regenerates. Pre-filtration for sediment is also crucial for well water to protect the softener’s resin beads.
Is softened water safe for drinking and irrigation?
Softened water is generally considered safe for drinking. The ion exchange process replaces hardness minerals with a small amount of sodium (or potassium, if potassium chloride is used). For individuals on a strict low-sodium diet, or those who prefer the taste of unsoftened water, it’s common to install a separate drinking water tap that bypasses the softener, or to use a reverse osmosis (RO) system for drinking water, which removes sodium. Regarding irrigation, softened water is typically not recommended for watering plants and lawns as the increased sodium content can be detrimental to plant growth. It’s advisable to install your water softener so that outdoor irrigation lines bypass the system, allowing you to use unsoftened water for your landscaping needs.
Conclusion
Investing in a residential water softener is a smart decision for any homeowner dealing with the challenges of hard water. From protecting your appliances and plumbing infrastructure to enhancing your daily comfort with softer skin and cleaner laundry, the benefits are substantial and contribute to a significant long-term return on investment.
We’ve explored the fundamentals of hard water, the various types of softening systems, critical sizing guidelines, and a comprehensive overview of the installation process. Whether you choose to undertake a DIY installation or opt for professional assistance, understanding these aspects will empower you to make informed choices. For complex installations or to ensure your system is perfectly matched to your home’s unique needs, we always recommend consulting with experienced plumbing professionals. They can provide expert advice, ensure proper installation, and help you maintain your system for years to come. For more information on improving your home’s water quality and professional services, explore options for Water Softener Installation.