CH&E Diaphragm Pump Repair Parts Every Buyer Should Know Before Fixing Their Pump
CH&E diaphragm pump repair parts are one of those things you don’t think about until you’re knee-deep in a muddy job site and your pump suddenly decides it’s taking the day off.
I remember the first time it happened to me on a construction project outside Phoenix.
The pump ran beautifully during setup-smooth pulses, steady flow-and then out of nowhere, it lost pressure and started rattling like it swallowed a toolbox.
That’s when I realized how much time and money you can save by knowing the right components before you attempt any repair.
If you’re fixing a diaphragm pump for the first time, or even if you’ve done it a dozen times, certain replacement components will always matter more than others.
Once you learn how each part behaves under stress, troubleshooting becomes more of a routine than a guessing game.
What most buyers overlook when choosing replacement components
Most people assume diaphragm pumps fail because of a single issue.
But from my experience, problems usually stack up quietly-just like stress cracks in an old work boot.
You rarely notice the warning signs until something finally gives out.
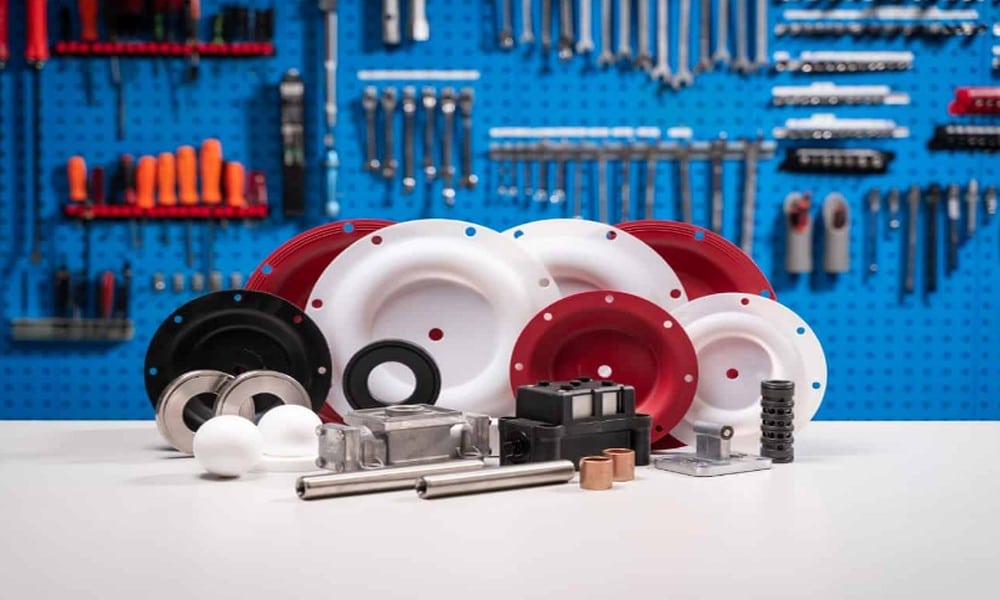
The small parts that make the biggest difference
The first thing I learned the hard way is this: small parts do big jobs.
Ignoring worn fasteners or a tired gasket can cause the same downtime as a damaged diaphragm.
Once, I skipped replacing a $12 sealing ring because I thought it “looked fine,” and that ended up causing a full breakdown two hours later, which sent me scrambling to order CH&E diaphragm pump repair parts before I could get the job running again.
The diaphragm: the part that decides whether the pump lives or dies
This is the most abused part of the entire system.
If the diaphragm starts to stiffen, blister, or tear, the pump loses its heartbeat almost immediately.
I’ve seen pumps with brand-new engines fail simply because the diaphragm couldn’t flex the way it was designed to anymore.
Whenever you inspect yours, focus on:
- Soft spots
- Surface cracking
- Edges thinning out
- Sections that look stretched or bubbled
A diaphragm that “almost works” is already on its last day.
Check the check valves before anything else
After the diaphragm, check valves are the next most common failure point.
A pump can’t move water or slurry properly if these valves stick, clog, or stop sealing.
I once tried pumping sandy floodwater after a storm, and the check valves jammed up so badly that the pump sounded like it was inhaling gravel.
When troubleshooting, look for:
- Debris blocking movement
- Warped rubber
- Worn seats
- Any part that feels “sticky” when you move it
Valve issues can mimic diaphragm issues, so diagnosing both saves a lot of guesswork.
Why the frame and hardware matter more than you think
Most people only focus on internal components, but the frame and hardware keep the entire unit functioning under stress.
A loose bracket or bent mounting point can cause unnecessary vibration, which in turn destroys internal parts much faster.
I learned this from a contractor who serviced pumps after pipeline bursts.
He told me he always checked the frame first because misalignment can cut the lifespan of new parts in half.
It was good advice-once I started doing that, I replaced fewer components over time.
Don’t forget about the connecting rods
These rods transfer the motion that powers the diaphragm’s pumping action.
If they wear unevenly, you’ll feel an off-balance vibration through the pump housing.
That’s exactly what happened to me once during a long irrigation job.
The pump still “worked,” but it shook like a washing machine with an unbalanced load.
Worn connecting rods may cause:
- Slower pumping
- Irregular pulses
- Extra noise
- Premature diaphragm wear
A quick inspection usually reveals whether any rods need swapping out.
Gaskets and seals – the silent heroes
Gaskets and seals rarely get credit, but they prevent leaks that can lead to drop in pressure or contamination.
If you notice moisture gathering around sections that should be dry, it’s nearly always the seals telling you they’re done.
The biggest mistake buyers make is assuming all seals are interchangeable.
They’re not.
Different materials handle chemicals, heat, and pressure differently.
I once made the mistake of using a general-purpose gasket during a slurry job.
It held for about thirty minutes and then turned into mush.
Lesson learned: match the material to the environment every time.
The bolts and fasteners you shouldn’t ignore
Fasteners gradually loosen because of vibration.
Every mechanic I’ve met has a story about a pump that self-destructed because a small bolt backed out over time.
For me, it happened during a job near a rocky drainage field.
The pump simply shook itself apart, and it was entirely preventable.
A simple habit-checking hardware every few uses-makes a huge difference.
Real-world signs your pump is begging for new parts
Here’s what typically shows up first when the pump needs attention:
- Slower flow rate
- Rhythmic knocking
- Sudden loss of suction
- Excessive vibration
- A faint rubber smell
- Moisture forming around housings
Any one of these is enough reason to shut the pump down and inspect it.
I always tell people the same thing: pumps communicate.
They warn you long before they fail.
Replacing parts vs buying a new pump – what most people get wrong
In many cases, fixing a pump costs a fraction of buying a new one.
I’ve repaired pumps for under $60 that went on to last several more seasons.
But other times, buyers keep replacing the wrong parts over and over because they skip a proper inspection.
A simple checklist helps:
- Look at the diaphragm
- Inspect both check valves
- Check the rods for wear
- Inspect fasteners and frame alignment
- Examine seals and gaskets
- Test pump movement manually
If three or more components show wear, replacing the whole pump starts making more sense.
Final thoughts: what every buyer should keep in mind
Fixing a diaphragm pump isn’t complicated once you understand the relationship between its parts.
Every component depends on the next, and ignoring one weak point can take down the entire system.
From my own experience, the biggest cost isn’t the replacement parts-it’s the downtime.
And downtime always shrinks when you know exactly what to look for, what to replace, and what signs to never ignore.