How to Paint Like a Trade Professional
Painting can feel like a daunting task its requires a lot of time and patience which will ensure a flawless finish, before you start any painting project on your home or business you should first ensure you have the right equipment with you.
If you’re not using the right equipment then it could compromise the finish of the paint which will leave you unsatisfied and calling a professional to finish the job properly at that point you have wasted your time, effort and money on something that is only going to have to be done again.
Before starting any painting, project ensure you have the following:
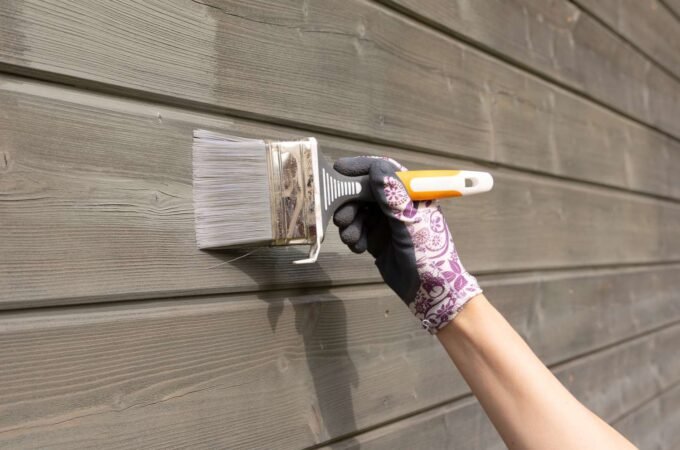
- Various sizes of paint brushes – Having a wide selection of paint brushes will help you paint both small and large surfaces, if your paint brush is too big you run the risk of getting paint on surfaces you did not intend to paint.
- Painting Rollers and trays – Paint rollers can help you paint walls fast, they’re better than brushes as they will distribute the paint evenly on flat surfaces such as walls and ceilings.
- Dust Sheets – Dust sheets are great for protecting your floors and furniture from speckles of paint, but you want to ensure you have a quality dust sheet which doesn’t allow paint to seep through, the fabric dust sheet are prone for this especially if you spill paint on the dust sheet and it will not protect the surface beneath it. Plastic dust sheets are best suited for painting as they do not allow the paint to sweep through and damage the surfaces beneath it.
- Decorators Caulk – Decorators caulk is perfect for tidying up edges and should be applied after the painting has been finished.
- Poly Filler – If you wall is damaged poly filler can help tidy up those holes and cracked surfaces and give them a new lease of life. Poly filler should be used before you start painting and should be sanded down to create a smooth flat surface.
- Sandpaper & Sanding Block – Sandpaper and a sanding block will help you create flat surfaces and helps remove excess poly filler evenly.
- Roller Extension Pole – Extension poles are a great way to paint surfaces such as ceilings where you could other not reach them.
- Paint – Ensure you have the correct paint and enough paint for the job.
- Masking Tape – Masking tape can help you keep your edges straight and can reduce over painting where surfaces lap over.
Once you have collected the items above you need to you can then start to paint your rooms.
3 Tips before Painting
- Plan how you’re going approach it? – The first thing you should do is make yourself a cup of tea or coffee take a step back and plan how you’re going to paint the walls and ceilings take into consideration door frames, window sills and where the walls are damaged before starting any painting. Ensure that any damaged walls have been filled, windowsills & door frames have been taped to avoid accidently painting them. Also take into consideration that any skirting boards will need to be taped.
- Filling holes and cracks – This should be the first job to ensure you get a good smooth finish as even after painting the damage to the wall will still exist and the appearance of your room will be hampered by the damage. Ensure that after you’ve filled the damaged sections of the wall that you sure a sanding paper and a sanding block to take away the roughness of the filler.
- Prep the walls – it is best practice that you clean the surfaces of your walls and ceilings before starting to paint and give them time to dry properly. If you do not do this, you run the risk of the paint not sticking to the wall properly and can later cause it to flake.
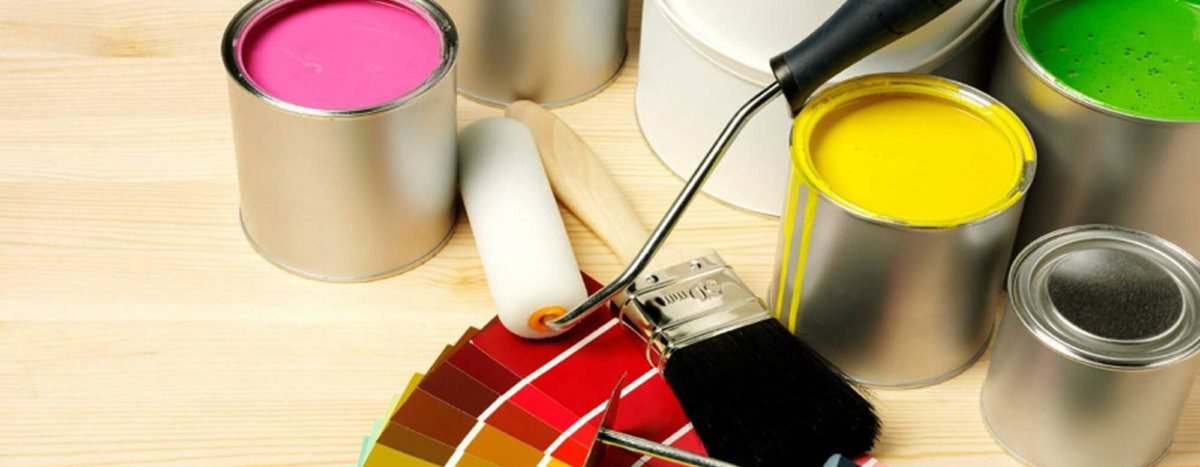
Choosing the Right Paint
Every type of paint serves a different purpose such as your living room paint is different from your bathroom paint. Each is designed to withstand the type of wear a room is subject too.
- Emulsion Paint – Emulsion paint is best suited for ceilings and walls it offers a thick coat which is easy to apply evenly.
- Gloss Paint – Gloss is ideal for wood such as skirting boards, doors and door frames.
- Masonry Paint – Masonry paint is used on bare bricks it’s a thick durable paint that is used on outdoor surfaces.
- Stabilising Primer – This is used to prevent damp coming through the finishing coat of the wall, if any of your rooms suffer from dampness then this will help stop the damp from showing through the top layer of paint.
- Undercoats – Undercoats are used as a base coat so that the topcoat takes to a surface better.
You can find a wide selection of trade paints available online or a your local store.
How to Apply Paint
Applying paint, the correct way can take years of practice, most people believe they can just apply the paint to the wall and get great results, in fact there is an art to this:
- Movement – It is best to apply the paint with a roller if you’re painting a ceiling or wall, ensure that you paint from multiple angles up down left right to ensure an even distribution of paint.
- Spraying – You can use spraying equipment to apply paint to your room, this does take up most paint and can still result in runs, its best to use the same technique that a car sprayer uses left to right starting from the top and working your way to the bottom.