Preparing To Start Plastering Your Home As A Novice Plasterer
Embarking on the journey of plastering when you are renovating your home as a novice can be exciting and daunting, but doing the job yourself can save a lot of money. Plastering is an art that requires patience, precision, and the right preparation, and taking your time can help you achieve an excellent result for the plastering in your project. This guide will walk you through the essential steps to ensure a smooth and successful plastering project.
Gather Your Tools and Materials
Before diving into plastering, having all the necessary tools and materials at your disposal is crucial. Start with the basics, such as:
- Plaster
- Mixing buckets
- Trowels
- A hawk
- A mixing paddle.
Don’t forget safety gear like gloves and goggles. Ensure your tools are clean and in good condition, as this will significantly impact the quality of your work.
Prepare The Walls
The success of your plastering project relies heavily on the condition of your walls. Begin by removing any wallpaper, loose paint, or debris. Use a scraper to eliminate stubborn patches, and sand the surface to create a smooth, even canvas. If there are cracks or holes, fill them with a suitable filler and allow it to dry completely. Smooth out the filled areas with sandpaper for a seamless finish.
Prime The Surface
Priming is a crucial step that often gets overlooked, and it is relatively simple to do. Applying a good-quality primer helps the plaster adhere to the wall, improves its durability, and prevents it from drying out too quickly. Choose a primer that suits the type of plaster you’re using and follow the manufacturer’s instructions for application.
Mix The Plaster
Achieving the right consistency when mixing plaster is an art in itself. Follow the manufacturer’s guidelines for your chosen plaster, and use a clean mixing bucket and paddle. Consistency is key – too thin, and it won’t stick; too thick will be challenging to work with. Aim for a smooth, creamy texture that spreads easily.
Use PVA Bonding
Consider applying a diluted PVA bonding solution to the wall before plastering for added adhesion. It will enhance the bond between the wall and the plaster, ensuring a longer-lasting finish. Allow the PVA to dry completely before applying the plaster.
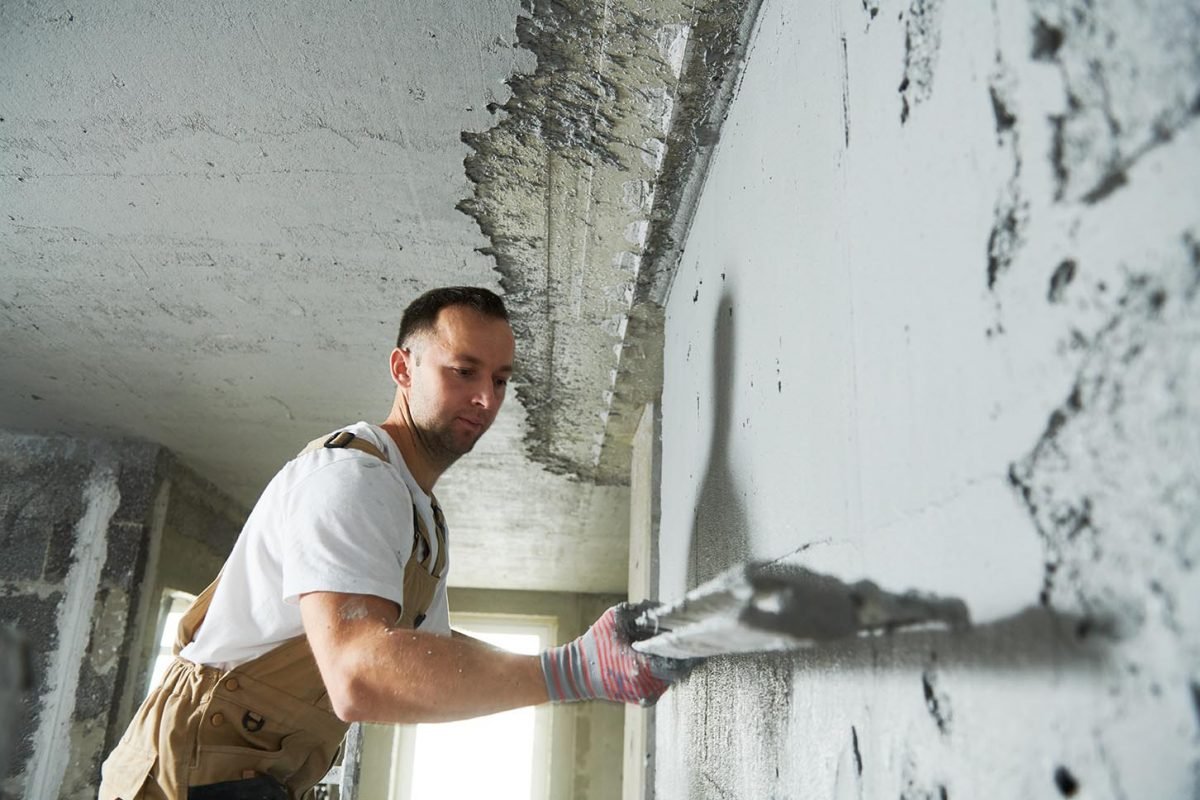
Work In Sections
Plastering an entire room at once can be overwhelming, especially for a novice. Break the job down into smaller, manageable sections. Apply the plaster in a thin, even coat, working from top to bottom. Once you’ve covered a section, use your trowel to smooth the surface before moving on to the next.
Master the Techniques
Plastering involves various techniques; as a novice, it’s essential to familiarise yourself with them. The two main techniques are the float and set and the one-coat methods. The float and set method involves applying a base coat (float) and allowing it to set partially before adding a finishing coat. The one-coat method is quicker but requires more skill as you apply a single, thicker coat.
Feathering The Edges
Creating seamless, feathered edges is crucial for a professional-looking finish. As you apply the plaster, feather the edges gently, using a gentle, sweeping motion. It helps blend the plaster with the surrounding wall, eliminating visible lines or unevenness.
Timing Is Everything
Plastering is a time-sensitive process, and timing plays a crucial role in achieving a flawless finish. Pay attention to the drying times specified by the plaster manufacturer and work accordingly. Trying to smooth or rework plaster that has started to set can result in a less-than-perfect finish.
Take Breaks
Plastering can be physically demanding, and taking breaks is essential. It prevents fatigue and allows you to step back and assess your work objectively. Use this time to make necessary adjustments and ensure consistency across your plaster surface.
Sanding & Finishing
Once the plaster is completely dry, typically after 24 hours, it’s time to sand and finish the surface. Use fine-grit sandpaper to smooth out imperfections, especially paying attention to corners and edges. Wipe away any dust with a damp cloth before applying a final coat of paint or a decorative finish.
Learn From Your Mistakes
Don’t be disheartened if your first attempt doesn’t yield perfection. Plastering is a skill that improves with practice. You want to take note of any mistakes, learn from them, and apply those lessons to your next project. Each attempt will bring you closer to mastering the art of plastering.
Preparing to plaster your home as a novice requires careful planning, the right tools, and a willingness to learn, mixed with patience. By following these steps and taking your time, you can achieve a professional-looking finish that will leave you with a sense of accomplishment and a beautifully plastered home. With so many resources available online, there is plenty of help for the novice plasterer when tackling this sometimes-daunting job in their home.