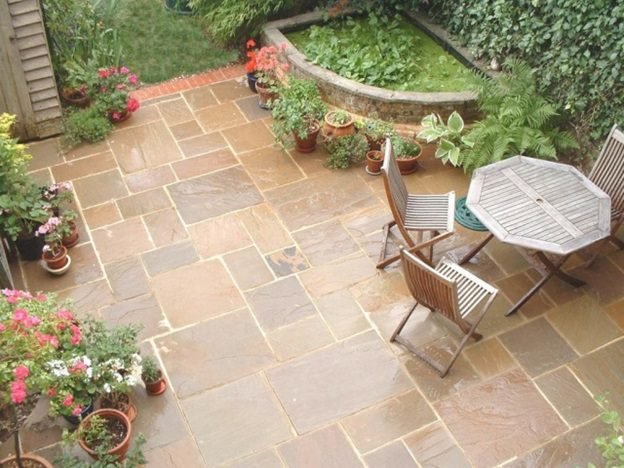
HOW TO LAY A GARDEN PATIO
Spending time outdoors in your backyard is a great way to relax and enjoy your summer. However, a suitable place for the barbecue grill, tables, and chairs call for a beautiful table patio.
Fortunately, building a brick and stone patio doesn’t require special skills. You just have to put aside a weekend, and you’ll soon be entertaining friends or enjoying a well-earned rest on your newly acquired patio.
There are a few things that are important to consider when looking lying down the patio. Here is a step to step guideline that will help you to turn your garden space into your garden bliss.
Plan for the Patio
It is essential first to plan what will be the size, placement and most importantly the inclination of the future patio for the drainage of the rainfall.
So after you decide where to lay the patio, draw a simple plan of the area including all measurement and dimensions.
If you have an idea of how you want to design your patio, you can add it to the plan. Once everything is planned, ensure you have all the right tools.
Basic Material Needed:
Wheelbarrow
Builder sand, gravel, and cement
Spade
Flagstones, pavers or bricks
Broom
Landscape fabric
Tampers or plate compactor
Shovel
Vibratory plate
Rubber Mallet
Spirit level
Prepare a sub-base
Tape measures
Work Safety
Wear appropriate personal protective gears such as gloves, boots or shoes, long pant, and sleeves.
Wear a hat and sunscreen to protect your skin from ultraviolet rays.
Put on safety goggles, ear protection, and a dust mask.
Ensure all the tools are in good shape and fit for use.
Keep away from loose clothing that can get caught in tool moving parts for instance jewellery.
Step 1: Prepare the Area
You can start by clearing and levelling the area you’ll put the patio. Remove all the weeds, plants and put a PVC material to prevent the weed from re-growing. It is crucial to remove the surface layer on the ground since it contains roots and grass which may trigger re-growth if it is not eliminated.
This will also be a plus to enhance the stability of the patio in the future. To ensure that the water won’t flood during the rainy season, create a slight slope by grading the ground to drop about ¼’’ per foot in the direction you want water to flow.
Additionally, you can compact the soil firmly using a hand tamp or wait for the great rain to carry out that task.
Step 2: Layout the sub-base
Lay about 5cm-8cm of hardcore using a rake to distribute uniformly. Then cover the surface with a thin layer (about 10mm) of sand and ballast. You can use a wrecker place to compact and level. This is very important because it will help to stop the rubbles from moving around when laying the slab.
Put down a bedding mortar that will not only improve as a land stabilizer but also help to hinder weed growth. The bedding mortar should consist of sand and cement in the 1:5. It will act as a bed on which you’ll lay the paving stones. The bedding mortar layer should be approximately 50mms on top of the hardcore.
Step 3: Lay the Paving
Now you are ready to begin laying pavers. You can use design or pattern -running bond, basket weave, herringbone-you would like. For a random design, you can place several slabs on the ground and check out which shapes are exciting and interlock well together.
Alternatively, you can cut out several pieces of paper to represent scaled –down slabs, try different designs and transfer your favourite one to the work on the ground.
For the first patio project, it is advisable to choose a pattern that doesn’t require cutting the patio material. Ensure you leave a 1cm gap between each slab which you’ll fill later with mortar. Remember to use a spirit level or plank of wood to ensure the slabs are well levelled.
Step 4: Fill in the joints and Edges of the patio
When all the bricks are in place, fill in the gaps between the paving slabs. You can get dry sand and spread on the whole surface using a bloom. Alternatively, use the plate compactor over the patio to help sand filter down and fill in the cracks and crevices.
After that use a vibratory plate or pour some water over the patio and pound every block with a rubber mallet to ensure that every block is settled. The trick is to make sure that all the joints are smoothed over and finished neatly.
Enjoy! Your home just got bigger-you have a new outdoor dining room, reading a book and favourite gathering spot. Just round up several outdoor seat and tables and enjoy the new patio. Roll out the chaise and have a well-deserved lemonade.