How To Adjust Hunter MP Rotator Sprinkler Heads
Adjusting rotating sprinkler heads can be very tricky if instructions are not followed properly. This is a very important skill to know when working with irrigation as a farmer, or as a landscaper. The Hunter rotary nozzles for the sprinklers come in many sizes and shapes.
Quotes are also available for request to find out which sprinkler will work best for outdoors. The difference between the sprinklers is the shape of their heads which I found very interesting. As I never installed a sprinkler before in my life. There are many tutorials that show you how to install a sprinkler on your front lawn or in the backyard.
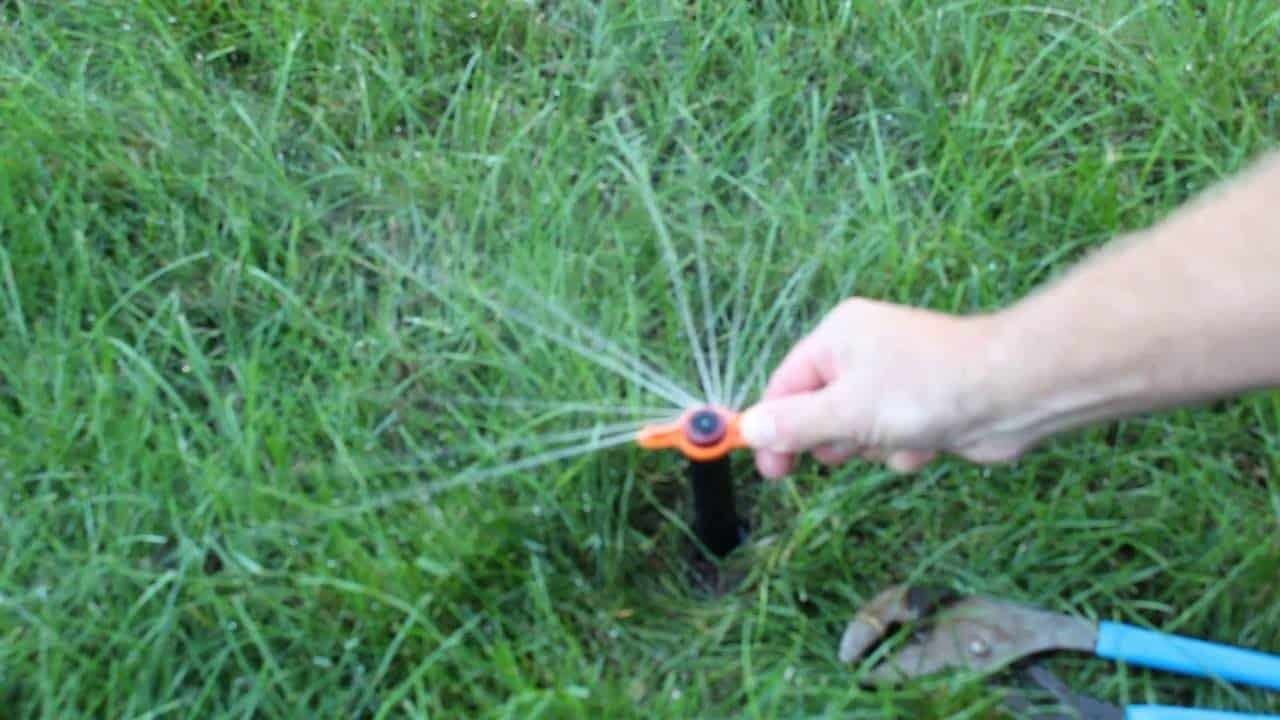
One particular video which can be found very useful is a tutorial on how to adjust a hunter rotor on sprinklers that rotate. The way how rotors on sprinklers work are that they are controlled by the arc and radius. The arc is the most crucial instrument on a sprinkler because it dictates just how far the water from the sprinkler will travel.
The hunter adjustment wrench is the tool that is used to adjust the radius of the sprinkler and how far the water will travel. The more clockwise the wrench turns on the sprinkler, then the farther the water will travel until its maximum range is reached. Once the screw is loose then the turret can be manually adjusted to where the sprinkler should spit out the water. Spinning the wrench in a more positive circle increases the circle range on the sprinkler.
Hunter Industries Inc. specializes in irrigation and fixing overhead sprinklers. The PGJ, PGP, and the I-20 sprinklers are recommended by the company for small commercial and residential installations. The company also manufactures sprinklers for sports fields. A special troubleshooting guide is published on the website which does a step-by-step tutorial on how to fix overhead sprinklers without any trouble.
Before beginning any repair, you must first determine what is causing the faulty rotor on the sprinkler. You must first determine the other rotors to see if they come on normally. If the rotors do come on normally then the rotor needs to be fixed itself. The zone first must be turned on to determine whether or not it sprays normally or out of control. If the zone spray is out of control then the nozzle must be installed. If the zone spray is spraying normally but it’s not rotating then the rotor needs to be replaced.
What also must be taken into consideration is the water filter since sometimes it needs to be replaced if no water is shooting out of the sprinkler rotor. It’s best to turn off the zone completely when replacing the rotor to clean the soil and dirt around the rotor in order to have easy access to the controls. In order to check the filter, the collar ring must be turned counterclockwise until it is loose to pull the rotor mechanism out of the housing. The rotor mechanism needs to be turned upside down to remove the filter screen with a dental pick. If the screen is clogged with unnecessary debris then it’s best to clean it with a toothbrush and water. Now all you need to do is replace the filter, and make sure to check and see if nothing is clogging the spring and rotor body. Finally, the rotor mechanism must be returned to its place to allow the tightening of the collar to allow the retesting of the rotor. While this tutorial might seem very complex, I think that it will come in handy to anyone looking to obtain experience in sprinkler fixing.