A Comparative Guide to Exterior Window Sealant Types
I often think about the hidden heroes of home maintenance. For me, the sealant around your outside windows is definitely one of them. It’s a small detail, but it does a big job.
This simple material acts as your home’s shield. It works tirelessly to keep out harsh weather, unwanted moisture, and even tiny pests. Beyond protection, a good seal means a more comfortable home and lower energy bills. It stops drafts and helps your heating and cooling systems work smarter.
In this guide, I’ll walk you through everything you need to know about sealing your windows. We’ll explore the different types of sealants, help you choose the best one for your specific needs, and cover the essential steps for applying it like a pro. And for those challenging projects, such as ensuring a perfect seal on high-rise buildings, I recognize the importance of specialized expertise in High-rise exterior window sealant.
Properly sealing your exterior windows is paramount for several reasons, extending far beyond mere aesthetics. Its primary functions are multi-faceted, contributing significantly to your home’s integrity, comfort, and energy efficiency.
Firstly, sealant acts as a critical weatherproofing barrier. It prevents rain, snow, and wind from infiltrating your home through the tiny gaps and cracks that naturally form around window frames. Without this barrier, water can seep into wall cavities, leading to severe issues like wood rot, mold growth, and structural damage. This water damage can compromise the very framework of your home, leading to costly repairs down the line.
Secondly, effective sealing is a frontline defense against air leaks. These leaks allow conditioned air to escape in summer and warm air to flee in winter, forcing your HVAC system to work harder to maintain a comfortable indoor temperature. This directly translates to higher energy bills. By sealing these gaps, you reduce drafts, improve indoor comfort, and significantly lower your home’s energy consumption. In fact, unsealed windows are a major culprit in energy loss, making proper caulking one of the most cost-effective home improvements for energy savings.
Finally, sealant plays a vital role in pest control. Small insects, spiders, and even rodents can exploit tiny openings around windows to gain entry into your home. A continuous, unbroken bead of sealant eliminates these entry points, keeping your living space free from unwanted guests. It also contributes to the overall structural integrity of your windows, preventing movement that could lead to further damage over time.
Choosing the right sealant for your exterior windows is not a one-size-fits-all decision. The market offers a variety of options, each with unique chemical compositions, flexibility, durability, and adhesion properties. Understanding these differences is crucial for selecting a product that will perform optimally for your specific needs and climate.
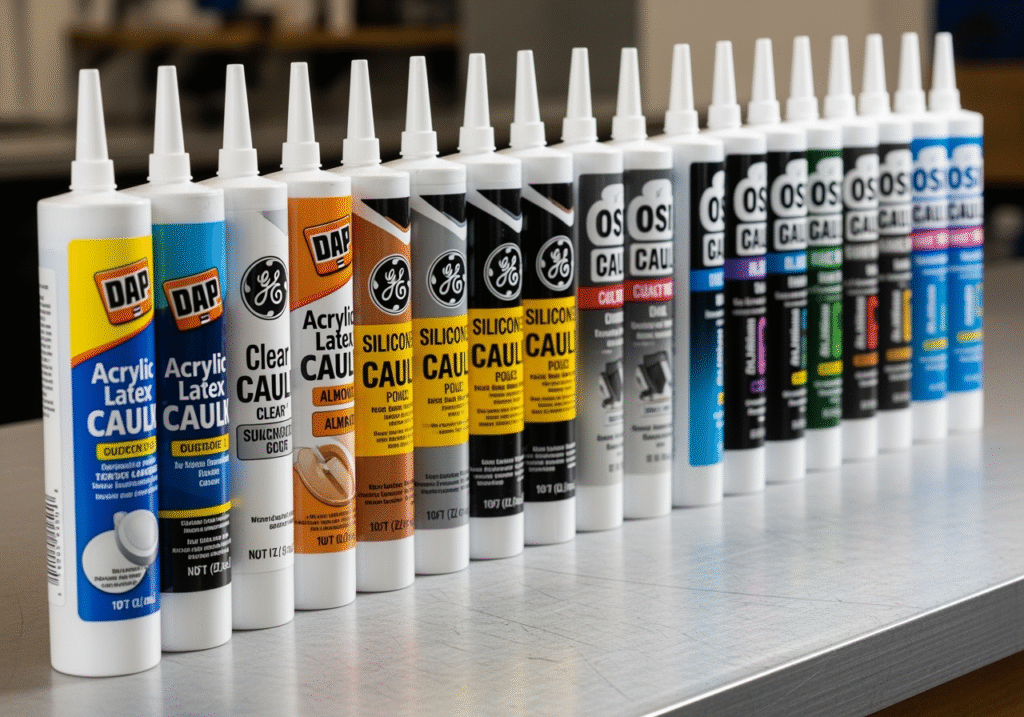
Here’s a comparative overview of the most common types of exterior window sealants:
Feature Silicone Sealant Polyurethane Sealant Hybrid Sealant (e.g., SMP) Acrylic Latex Caulk Butyl Rubber Caulk Flexibility Excellent (High elasticity) Very Good (High elasticity) Excellent (High elasticity) Low to Moderate (Can crack with movement) Moderate (Less flexible than silicone/PU) Durability Excellent (Long-lasting) Excellent (Very tough) Excellent (Combines best of both) Fair (Prone to cracking) Excellent (Highly resistant) Paintability No Yes Yes Yes No UV ResistanceExcellent (Does not degrade in sunlight) Good (Can degrade over time) Excellent Poor (Can chalk/harden) Excellent WaterproofExcellent Excellent Excellent Good (Can absorb water if not siliconized) Excellent Adhesion Good (Often requires clean, dry surface) Excellent (Strong bond to many materials) Excellent (Strong and versatile) Good (Best on porous surfaces) Excellent (Strong, tenacious bond) Lifespan 10-20+ years 5-10 years 10-20 years 1-5 years 10-20+ years CleanupMineral spirits/solvent Mineral spirits/solvent Soap and water (some types) / solvent Water Mineral spirits/solvent Cost High High High Low Moderate to High Silicone Sealants: The Flexible Weatherproofer
Silicone caulk is arguably the most widely used type of caulk for exterior windows and doors, and for good reason. Its primary benefit is its exceptional flexibility and elasticity, allowing it to withstand significant joint movement caused by temperature fluctuations and building settling without cracking or losing adhesion. This high flexibility makes it an excellent choice for materials like vinyl, metal, and fiberglass window frames.
Furthermore, silicone boasts excellent UV resistance, meaning it will not degrade, chalk, or become brittle when exposed to harsh sunlight over time. It is inherently waterproof, forming a tight, impermeable seal that effectively repels moisture. This combination of flexibility, UV stability, and waterproofing contributes to its remarkably long lifespan, often lasting 10 to 20 years or more.
However, silicone sealants do have their drawbacks. The most significant is that they are generally not paintable. Once cured, paint will not adhere to silicone, or if it does, it will quickly crack and peel. This means you must carefully choose a silicone color that matches your window frame or trim. Additionally, silicone can be more challenging to tool smoothly compared to water-based caulks, and cleanup typically requires mineral spirits or other solvents, which can be messier.
Polyurethane Sealants: The Tough and Durable Option
Polyurethane caulk is another high-performance option for exterior window applications, prized for its robust adhesion and durability. It forms a very strong bond with a wide range of building materials, including wood, masonry, concrete, and metal. This makes it an excellent choice for projects where strong adhesion to diverse substrates is critical.
A significant advantage of polyurethane is that it is paintable, allowing you to seamlessly integrate the sealant with your home’s exterior paint scheme. It offers good flexibility, capable of handling moderate joint movement, and provides excellent waterproofing.
On the downside, polyurethane caulk typically has a shorter lifespan than silicone, usually lasting around 5 to 10 years, especially when exposed to direct sunlight and significant movement. It can also be messier to work with, tends to have a slower cure time (often several days to a week for full cure), and requires solvents for cleanup. Some polyurethane sealants can also be susceptible to UV degradation over time, potentially leading to a loss of flexibility or chalking.
Hybrid and Other Sealant Options
Beyond silicone and polyurethane, several other sealant types offer specialized benefits for exterior windows:
- Hybrid Sealants (e.g., SMP – Silyl Modified Polymer): These newer formulations combine the best attributes of both silicone and polyurethane. They offer excellent flexibility and elasticity, superior UV resistance, and strong adhesion to a variety of materials. Crucially, most hybrid sealants are paintable, providing the aesthetic versatility of polyurethane with the durability of silicone. They are an increasingly popular choice for high-performance exterior applications, offering a good balance of features.
- Acrylic Latex Caulk (and Siliconized Latex): Standard acrylic latex caulk is water-based, making it very easy to apply and clean up with water. It is also paintable. However, its significant limitation for exterior use is its low flexibility and poor resistance to harsh weather and UV exposure. It tends to crack, chalk, and degrade quickly in outdoor environments, especially in areas with significant temperature fluctuations or moisture. Siliconized latex caulk improves upon basic acrylic latex by adding a small amount of silicone, enhancing its flexibility and water resistance, but it still generally falls short of pure silicone, polyurethane, or hybrid sealants for demanding exterior window applications. It’s best reserved for interior use or very dry, mild climates.
- Butyl Rubber Caulk: This is an extremely durable and highly resistant sealant, often considered the most resistant and long-lasting option for harsh climates. It forms a tenacious, waterproof bond and has excellent UV resistance. While less flexible than silicone or polyurethane, it’s incredibly tough. The main drawback of butyl rubber caulk is its very messy application and difficult cleanup, often requiring specialized solvents. It’s typically used in commercial applications or for specific, demanding exterior tasks like sealing gutters or flashing, but can be a choice for windows in extreme conditions where maximum durability is prioritized over ease of application.
How to Choose the Right Sealant for Your Project
Selecting the ideal sealant for your exterior windows involves a careful consideration of various factors, including the specific materials of your window frames and siding, the local climate, and your aesthetic preferences (e.g., paintability). My goal is always to guide you toward a choice that ensures longevity, performance, and a professional finish.
Matching the Best Exterior Window Sealant to Your Home’s Materials
The compatibility of the sealant with the surrounding materials is paramount for proper adhesion and long-term performance.
- Wood Frames: For traditional wood windows and trim, a paintable sealant is often preferred to match the existing finish. Polyurethane or high-quality hybrid sealants are excellent choices due to their strong adhesion to wood and paintability.
- Vinyl Frames: Vinyl windows are common and require a sealant that adheres well to plastic and offers high flexibility to accommodate vinyl’s expansion and contraction. Silicone or hybrid sealants are typically recommended here, with silicone being particularly effective due to its UV resistance which prevents degradation on exposed vinyl.
- Aluminum Frames: Similar to vinyl, aluminum frames benefit from flexible sealants that can bond well to metal. Silicone and hybrid sealants are strong contenders, offering good adhesion and weather resistance.
- Fiberglass Frames: Fiberglass is a stable material, but still benefits from a flexible sealant. Silicone or hybrid options work well, providing durable adhesion and UV protection.
- Brick Siding: When sealing against porous materials like brick, a sealant with excellent adhesion and some elasticity is needed. Polyurethane and hybrid sealants are often preferred as they bond strongly to masonry and can handle the slight movement between the window frame and the brick.
- Stucco: Stucco is also a porous and textured surface. A sealant that can bridge the gap effectively and adhere to the rough texture, while offering flexibility, is key. Polyurethane or high-quality hybrid sealants are good options.
- Fiber Cement: Fiber cement siding expands and contracts with temperature changes. A sealant with strong adhesion and significant flexibility (like polyurethane or hybrid) is essential to accommodate this movement without cracking. The “How to Caulk Windows Like a Pro” guide emphasizes applying a sufficiently thick bead between fiber cement siding and windows to allow for this expansion and contraction.
Considering Climate and Paintability
Your local climate plays a significant role in sealant selection.
- UV Exposure: If your windows receive significant direct sunlight, UV-resistant sealants are critical. Silicone and hybrid sealants excel here, resisting degradation and chalking. Polyurethane can perform well but may experience some surface degradation over many years in intense sun.
- Temperature Fluctuations: Areas with extreme hot and cold cycles demand highly flexible sealants that can expand and contract without cracking. Silicone and hybrid sealants are designed for this.
- Rainfall and Humidity: In wet or humid climates, a sealant’s waterproofing and mildew resistance are paramount. Silicone and high-quality hybrids offer superior water resistance. Some sealants, like Sashco’s CleanSeal, even incorporate enzymes to actively prevent mold growth.
- Harsh Climates: For exceptionally harsh environments (e.g., coastal areas with salt spray, extreme temperature swings), butyl rubber caulk or high-performance hybrid sealants might be the most robust choice, prioritizing maximum durability.
- Paintable vs. Non-Paintable: This is an aesthetic decision. If you want to paint over the sealant to match your trim or siding, you must choose a paintable option like polyurethane or a hybrid. If precise color matching is available in a non-paintable sealant (like many silicones), and you don’t intend to paint, then a non-paintable option is fine. Silicone is generally not paintable, while acrylic latex, siliconized latex, polyurethane, and most hybrids are.
A Step-by-Step Guide to Applying Sealant Like a Pro
Applying sealant to your exterior windows is a skill that improves with practice, but following a systematic approach will help you achieve a professional, long-lasting result. My aim is to empower you with the knowledge to tackle this crucial home maintenance task effectively. For high-rise buildings or complex jobs, professional window caulking services ensure safety and a perfect seal, especially when working at height or with specialized materials.
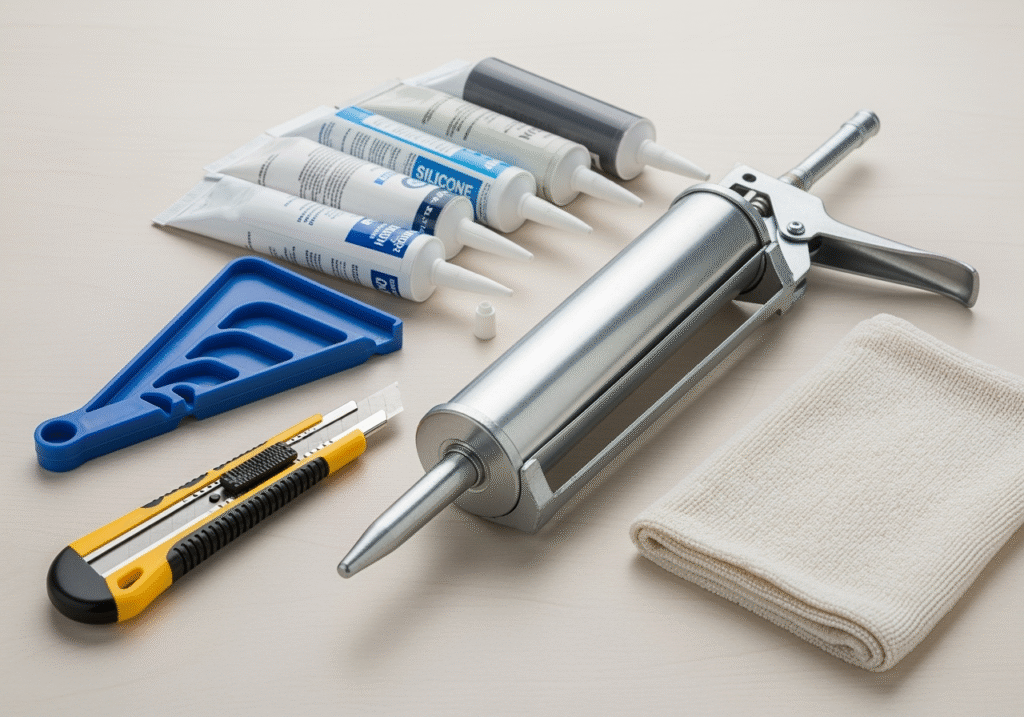
Essential Tools and Materials
Before you begin, gather all your tools and materials. Having everything at hand will make the process smoother and more efficient.
- Dripless Caulking Gun: A good quality caulking gun with a thumb release is essential. It allows you to instantly stop the flow of caulk, preventing messy oozing.
- Utility Knife: For cutting the caulk tube nozzle and for removing old caulk.
- Scraper/Putty Knife: To scrape away old, stubborn caulk.
- Cleaning Supplies: Rags, a bucket of water, and an alcohol-based cleaner or mineral spirits (depending on the old caulk type) for surface preparation.
- Foam Backer Rod: For filling gaps wider than 1/4 inch before applying caulk.
- Painter’s Tape: To create clean, straight lines and protect adjacent surfaces.
- Smoothing Tool: A specialized caulk tool, a plastic spoon, or even a gloved finger (for water-based caulks) to create a smooth, concave bead.
- Gloves and Eye Protection: Always prioritize safety.
Step 1: Preparation is Key
The success of your new sealant heavily relies on proper preparation. This is not a step to rush.
- Remove Old Caulk Completely: This is perhaps the most critical step. New caulk will not adhere properly to old, failing caulk. Use a utility knife and scraper to remove all traces of the old material. For stubborn, dried-out caulk, you might need a commercial caulk remover or a heat gun (use with caution). Ensure the joint is completely free of debris.
- Clean the Surface Thoroughly: Once the old caulk is removed, clean the entire area. Use a stiff brush or vacuum to remove loose dust and debris. Then, wipe the surfaces with an alcohol-based cleaner (like rubbing alcohol) or mineral spirits to remove any remaining residue, grease, or dirt. Allow the surface to dry completely. A clean, dry surface ensures optimal adhesion for the new sealant.
- Insert Foam Backer Rod for Large Gaps: If there are any gaps around your windows or doors larger than 1/4 inch wide, fill them with a foam backer rod first. This provides a surface for the caulk to adhere to, controls the depth of the sealant joint, and helps the caulk form an optimal “hourglass” shape, which maximizes its flexibility and lifespan. Caulk is intended for use on relatively narrow seams, typically ¼-inch wide or tighter.
- Tape for Clean Lines (Optional but Recommended): For a truly professional finish, apply painter’s tape along both sides of the joint where you intend to apply the caulk. Leave a gap that matches the desired width of your caulk bead. This acts as a guide and ensures a perfectly straight, clean line.
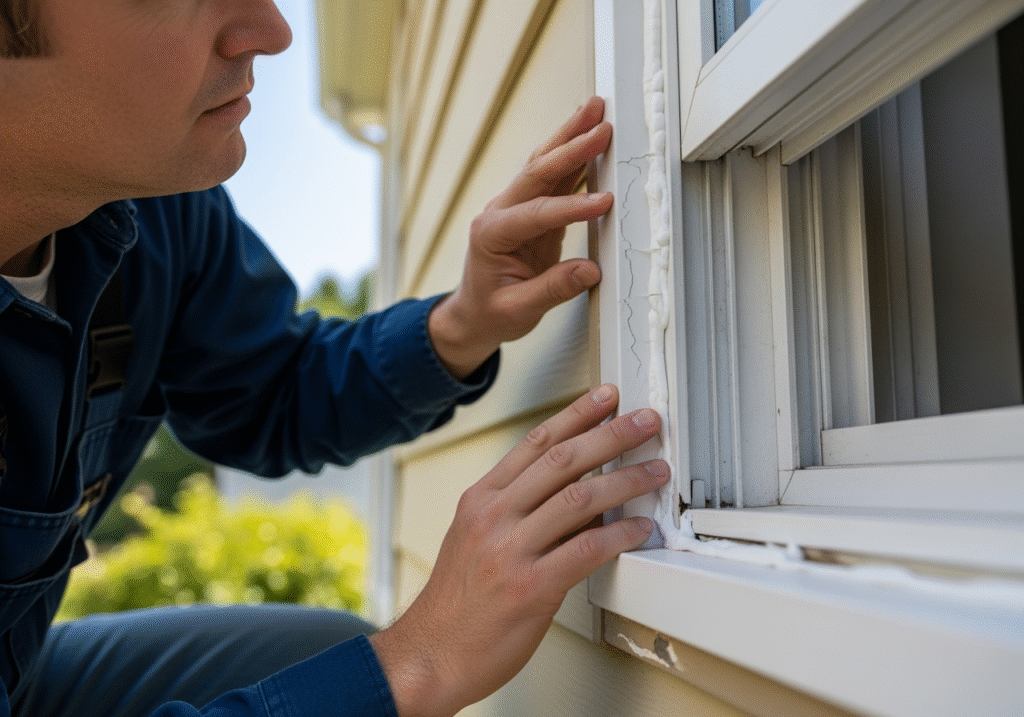
Step 2: Application and Finishing Techniques
With preparation complete, it’s time for the application.
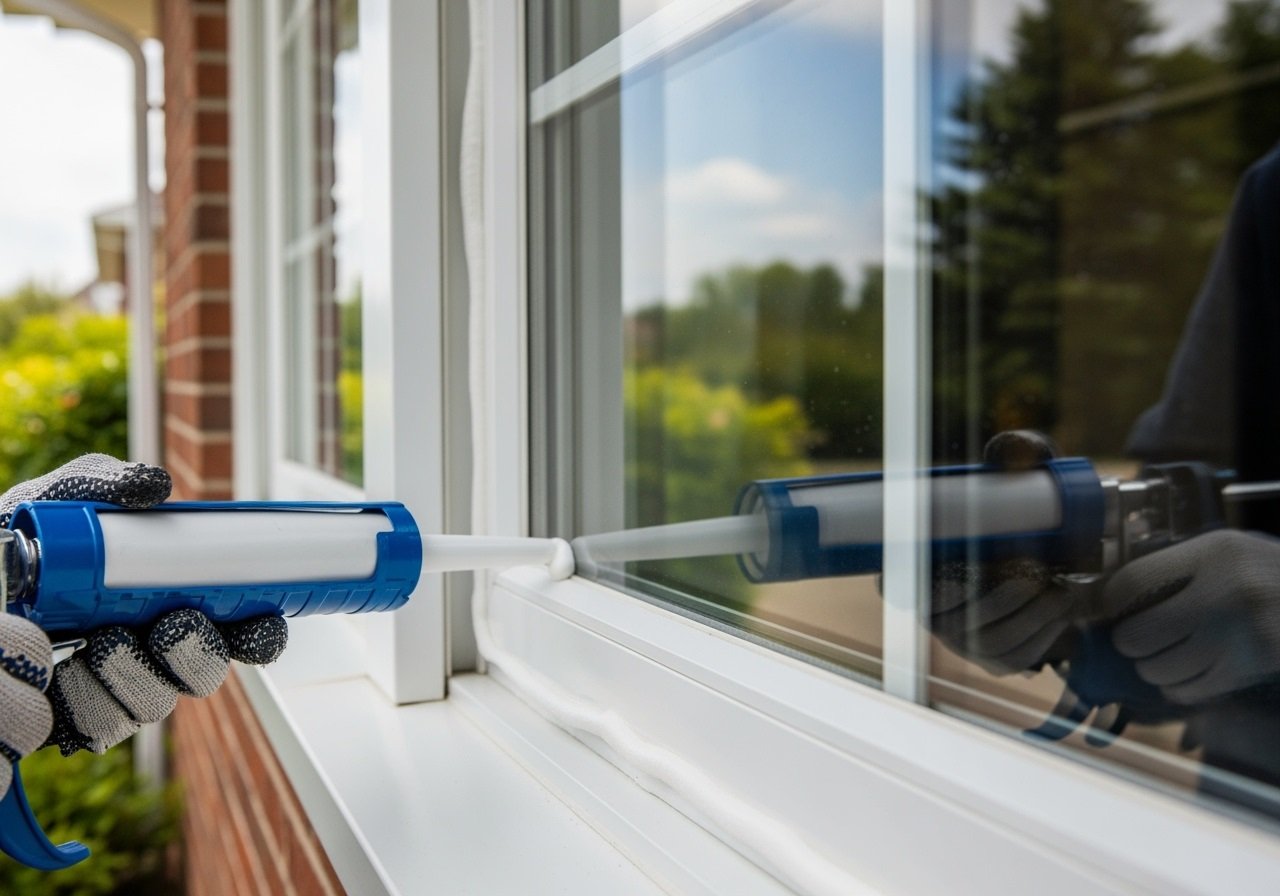
- Cut the Nozzle: Using your utility knife, cut the tip of the caulk tube nozzle at a 45-degree angle. Start with a small opening – you can always cut more to widen the bead if needed. The size of the opening should match the width of the gap you’re filling.
- Apply a Continuous Bead: Place the nozzle at the beginning of your joint, maintaining the 45-degree angle. Apply steady, even pressure to the caulking gun trigger while moving the gun smoothly along the joint. Aim for a continuous, unbroken bead. For long runs, it’s often easier to work in sections of 2-3 feet.
- Tooling the Bead: Immediately after applying a section of caulk, use your smoothing tool (or a gloved, wet finger for water-based caulk) to tool the bead. This presses the caulk into the joint, ensuring maximum adhesion to both surfaces, removes air pockets, and creates a smooth, concave finish. A concave shape is ideal as it allows the caulk to stretch and compress effectively with joint movement.
- Remove Painter’s Tape: If you used painter’s tape, remove it immediately after tooling the caulk, while the caulk is still wet. Pull it away at a 45-degree angle to avoid disturbing the freshly applied bead.
Common Mistakes and Safety
Avoiding common pitfalls will save you time and frustration, and ensure a durable seal.
- Caulking Over Old Caulk: As mentioned, this is a recipe for failure. Always remove the old material.
- Applying in Wrong Weather: Most sealants have specific temperature and humidity ranges for optimal application. Applying in extreme heat, cold, or high humidity can affect cure time and adhesion. Aim for mild, dry conditions.
- Using the Wrong Sealant: Matching the sealant type to your materials and climate is crucial. A cheap acrylic latex caulk won’t last on an exterior window.
- Blocking Weep Holes: Many window frames have small holes at the bottom called “weep holes.” These are designed to allow any water that gets into the window channel to drain out. Never caulk over these; blocking them can lead to water accumulation and damage.
- Ladder Safety: When working on exterior windows, especially on upper floors, ladder safety is paramount. Ensure your ladder is stable on level ground, extend it properly, and always maintain three points of contact. If you’re uncomfortable working at heights or the job is extensive, consider professional help.
- When to Call a Professional: For complex window designs, very high windows, or if you simply lack the time, tools, or confidence, don’t hesitate to call a professional. They have the expertise, equipment, and safety training to ensure the job is done correctly and safely.
Maintenance and Lifespan of Your Window Sealant
Once your exterior windows are properly sealed, the job isn’t entirely finished. Like any component of your home, sealant requires periodic inspection and maintenance to ensure its continued effectiveness. My recommendation is to conduct an annual visual inspection to catch any issues early.
How Long Does Exterior Window Sealant Last?
The typical lifespan of exterior caulk around window frames can vary significantly, generally ranging from 5 to 10 years, and sometimes even 20+ years for high-performance sealants like silicone or quality hybrids. However, several factors can influence this longevity:
- Sun Exposure: Prolonged exposure to direct UV radiation is one of the biggest enemies of caulk. Sealants with poor UV resistance will degrade, chalk, and become brittle much faster.
- Joint Movement: Windows and their surrounding materials naturally expand and contract with temperature changes. Sealants with low flexibility will crack and fail quickly under this stress. Highly elastic sealants are designed to accommodate this movement.
- Sealant Type: As discussed, silicone and hybrid sealants generally offer the longest lifespans due to their superior flexibility, UV resistance, and adhesion. Polyurethane is also durable but might have a slightly shorter life than silicone in direct sun. Acrylic latex, even siliconized, has the shortest lifespan for exterior use.
- Application Quality: A poorly applied bead, insufficient surface preparation, or using the wrong sealant for the job will drastically reduce its effective life.
Signs It’s Time to Re-Caulk Your Windows
Regular inspection is key to proactive maintenance. Look for these common signs that your window sealant is failing and needs replacement:
- Cracking: Small hairline cracks or larger fissures appearing in the caulk bead are clear indicators of failure. This means the sealant has lost its flexibility and is no longer moving with the building materials.
- Peeling: If the caulk is lifting or peeling away from the window frame or siding, its adhesion has failed, creating gaps for water and air to enter.
- Discoloration: While some discoloration is normal over time, significant yellowing, darkening, or uneven color can indicate degradation, especially for lighter-colored sealants.
- Brittleness: If the caulk feels hard, stiff, and easily breaks when pressed, it has lost its elasticity and is no longer providing a flexible seal.
- Gaps Re-appearing: If you notice new gaps or the original gaps opening up again, the sealant is no longer effectively bridging the space.
- Drafts or Water Leaks: The most obvious signs of sealant failure are feeling drafts near your windows or noticing water stains on the interior sills or walls after rain.
Conducting an annual visual inspection, ideally in the spring or fall, allows you to identify these issues early. Addressing failing caulk promptly prevents minor problems from escalating into major, costly repairs.
Frequently Asked Questions about Sealing Outside Windows
I often get asked specific questions about exterior window sealing. Here are some of the most common ones, along with my insights:
Can you apply new caulk over old caulk?
No, you cannot apply new caulk over old caulk. This is a common mistake that leads to premature sealant failure. New sealant will not adhere properly to old, failing caulk, resulting in a weak bond that will quickly crack, peel, or separate. The old caulk acts as a barrier, preventing the new material from bonding directly to the clean, prepared substrate. Always take the time to completely remove the old material and clean the surface thoroughly before applying any new sealant.
What is the best temperature to apply exterior caulk?
Most sealants perform best when applied in mild, dry weather, typically between 40°F and 90°F (4°C and 32°C). Applying caulk within this range allows for optimal curing and adhesion. Applying in extreme cold can make the caulk difficult to extrude and cure properly, while extreme heat can cause it to skin over too quickly or become too runny. High humidity can also affect cure times. Always check the specific product label for the manufacturer’s recommended application temperature range, as some specialized sealants can be applied in colder conditions.
How do you fill a large gap around an exterior window?
For gaps wider than 1/4 inch, you should first press a foam backer rod into the gap to fill the majority of the space. The backer rod should be slightly larger than the gap so it fits snugly. This creates a proper subsurface for the caulk, preventing it from sagging or cracking, and ensures the caulk forms the correct “hourglass” shape for maximum flexibility. Once the backer rod is in place, then apply the sealant over the rod, tooling it smooth for a durable, flexible seal. Never try to fill a large gap with just caulk, as it will likely fail quickly.
Conclusion: A Small Project with Big Returns
I hope this guide has illuminated the critical role that proper sealant plays in maintaining the health and efficiency of your home. Sealing your exterior windows is far more than a cosmetic fix; it’s a fundamental aspect of home protection that yields significant returns.
By investing a little time and effort into this task, you’re not just improving the appearance of your windows. You’re actively contributing to substantial energy savingsby preventing drafts and reducing the workload on your heating and cooling systems. You’re providing robust protection from the elements, safeguarding your home against water damage, mold, and structural decay. And ultimately, you’re enhancing the overall comfort and value of your property.
Whether you choose to tackle this as a manageable DIY project or opt for professional assistance for more complex jobs, the message remains clear: inspect your windows, understand your options, and take action. A well-sealed home is a comfortable, efficient, and resilient home.