Streamlining Home Network Cabling: Making Installation and Setup Easier for Household Users
A wired home network offers significant advantages over Wi-Fi in terms of speed, reliability, and security. Multi-gigabit broadband has become mainstream. Optimizing your home’s network cabling has never been more crucial. Certain techniques can make setting up high-performance wired networks simpler for regular households.All you need is proper planning, cable selection, and installation.
Why a Wired Network Trumps Wi-Fi
Recent surveys show that nearly 90% of Americans primarily depend on Wi-Fi for their home networking needs. However, Wi-Fi has limitations in terms of range, speed, and susceptibility to interference. A wired Ethernet network can deliver:
- Faster speeds – Wired networks can easily achieve Gigabit speeds over long distances. The latest Wi-Fi 6 only offers up to 1 Gbps bandwidth in ideal conditions.
- Lower latency – Wired connections have consistent sub-millisecond latency. This is in comparison to higher and fluctuating latency on busy Wi-Fi networks. This matters for gaming and video streaming.
- Greater reliability – Ethernet cables do not face interference or signal drops. Wi-Fi performance degrades with distance and obstacles.
- Enhanced security – Wired networks are not as easily accessible to intruders as Wi-Fi networks. There’s virtually no risk of snooping or spoofing on wired networks.
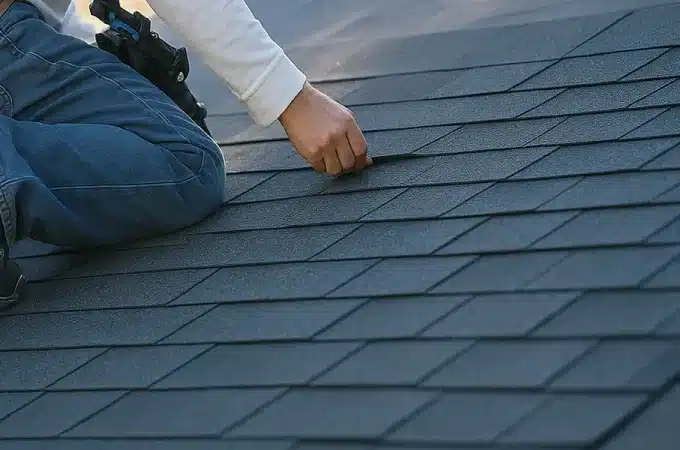
As fiber and cable broadband hit multi-gigabit speeds, Wi-Fi is often the bottleneck. To ensure fast and reliable whole-home coverage, it’s essential to wire up your home network. If you live in Florida, professional network cabling Miami services can wire up your home network. Their experienced technicians can handle everything from planning to cable installation.
Mapping Out Your Home’s Network Layout
The first step in streamlining the installation of your home’s structured cabling is to plan it out. You need to determine where Ethernet port connections are necessary.
Consider the following when deciding on placement:
- Where will your primary router/modem be located?
- What rooms require wired access for stationary devices like desktop PCs, smart TVs, game consoles?
- Do you need outdoor Ethernet ports for security cameras, lighting etc.?
- What areas have weak Wi-Fi coverage that need extending with access points?
Having floor plans is handy. Walk through your home to identify device locations. Having floor plans can be helpful before deciding where to run your cables.
Also factor in aesthetics – you may want to conceal cables along baseboards or in cable conduits. Leaving access for future cable runs is also wise.
CAT5e, CAT6, or CAT6a – Which Cable Do You Need?
When wiring up your home, choosing the appropriate category of Ethernet network cable is vital. Here is how the commonly used cable grades compare:
| Cable Type | Max. Speed | Ideal Usage |
| CAT5e | 1 Gbps | Budget home/office networking |
| CAT6 | 10 Gbps | Future-proof home media networks |
| CAT6a | 10 Gbps | Data centers and connectivity up to 100 meters |
CAT5e cables are sufficient for basic 1Gbps networks and short runs. CAT6 supports future multi-Gig networks over longer distances, reaching up to 55 meters.
CAT6a delivers enhanced 10Gbp performance past 100 meters. It is overkill for homes but useful for industrial settings.
Shielded cables provide better noise immunity but are not required for household use. Stranded cables, with more flexible conductors, are easier to work with during installation.
Choose CAT6 for most homes to allow upgrading to faster speeds. To ensure quality, purchase UL-verified cables from reputable brands.
Running Cables Through Walls and Attics
Now comes the fun part – routing your cables through the house walls or crawlspaces. Here are some tips:
- Use cable staples or conduits for a tidy installation along walls and baseboards.
- When drilling holes, use edge guards and grommets to prevent shearing and protect cables.
- For exterior cabling, use UV-resistant and weatherproof-jacketed cables with gel-filled connectors.
- In attics, suspend cables using J-hooks and fasteners to prevent damage from pests.
- Label both ends of cables clearly to avoid confusion. Leave some slack for minor adjustments.
- Avoid running cables parallel to electrical lines or near sources of EMI like motors.
A helper can be useful when fishing cables through walls and ceilings over long distances. Having the right tools like a fish tape also simplifies the process.
Standard vs. Daisy Chain Wiring Method
There are two popular approaches to connecting Ethernet cables from a central switch location to multiple rooms:
Standard Method
- Each cable runs directly from the switch to the individual port.
- Provides dedicated bandwidth to each location.
- More cables required, only suits new constructions.
Daisy Chain Method
- Cables are chained sequentially between ports.
- Reduces cabling but segments bandwidth.
- Works well for simple retrofit upgrades.
The standard method ensures the best performance but requires more cabling. Chaining is easier for extending networks in existing homes.
Plan your wiring method based on your home’s layout, network size, and speed requirements.
Essential Tools for Installation Success
The following tools will significantly streamline the installation process:
- Punch down tool – To securely connect cables to jacks and patch panels.
- Cable stripper – For cutting jacket layers and stripping cable ends.
- Crimping tool – For attaching RJ45 connectors to cable ends.
- Cable tester – For verifying cable continuity and identifying faults.
- Network cable tracer – Helps track cables visually despite concealment.
- Cable lubricant – Reduces friction when pulling cables through conduits.
- Drill bits set – For drilling precise holes when surface mounting.
Investing in this basic toolkit will make DIY cabling more manageable. Having spare connectors and a cable spool for large homes is also recommended.
Creating Secure RJ45 Network Ports
Attaching RJ45 connectors properly ensures robust network cable ports. Follow these steps:
- Use the cable stripper to cut and strip 1.5 inches off the cable end.
- Untwist the wire pairs and align them per the T568A/T568B wiring standards.
- Trim the wires leaving 1/2″ untwisted length. Insert them flat into the RJ45 plug.
- Use the crimping tool to securely press the connector. Avoid overcrimping.
- Test cable continuity. Secure the plug clip and insert the connector into the jack.
Pay close attention to the wiring order at both ends. Cables must follow the same TIA/EIA-568A or 568B standard at both ends. Miswiring can lead to connectivity issues and degraded performance.
Advanced Tips for Smoother Installation
Here are some pro tips to handle tricky situations:
- Use coupler wall plates to extend short cable runs instead of splicing cables.
- Move large furniture first before installing floor-level cabling along baseboards.
- Keep dust caps on ports during installation to avoid debris entering connectors.
- Use shielded/foiled cables or grounded conduits for cabling near electrical lines.
- Install vertical cable organizers to manage multiple wire runs to racks.
- Label both cable ends immediately to avoid mix-ups in dense wiring closets.
Taking precautions will prevent many common issues during home network cabling deployments.Stay organized and exercise due diligence.
Frequently Asked Questions
Q: Can I run Ethernet and electrical wires in the same conduit?
A: It’s best to isolate Ethernet and electrical wiring. If using shared conduits, maintain at least 12 inches separation.
Q: What cable grade should I use for a 10G home network?
A: CAT6a cables are ideal for home networks intending to upgrade to multi-gigabit speeds exceeding 1Gbps.
Q: How difficult is it to install outdoor Ethernet cabling?
A: Exterior cable runs require weatherproof cables jacketed in UV-resistant material. Installing conduits simplifies the process.
Conclusion
Structured cabling forms the backbone of reliable and high-speed home networks. Following the guidelines in this article helps streamline wired home networking for DIYers. Planning, selecting the right cables, installation best practices, and using the proper tools and accessories. Investing some effort upfront in strategically cabling your home saves headaches for years down the road.
Call to Action
Ready to upgrade your network? Get free quotes from pre-screened local network cabling contractors on our website. Our network of professionals can handle everything from planning to cable installation.
Lynn Place is Vice President of Marketing for SolvChem Custom Packaging Division. She has 30 years of professional experience in the manufacturing industry and specializes in consumer packaged goods, new product development and strategic planning.