From Concept to Reality: Planning Your Perfect Kitchen with 3D Modeling
Table of Contents
ToggleThe Power of 3D Visualization in Kitchen Design
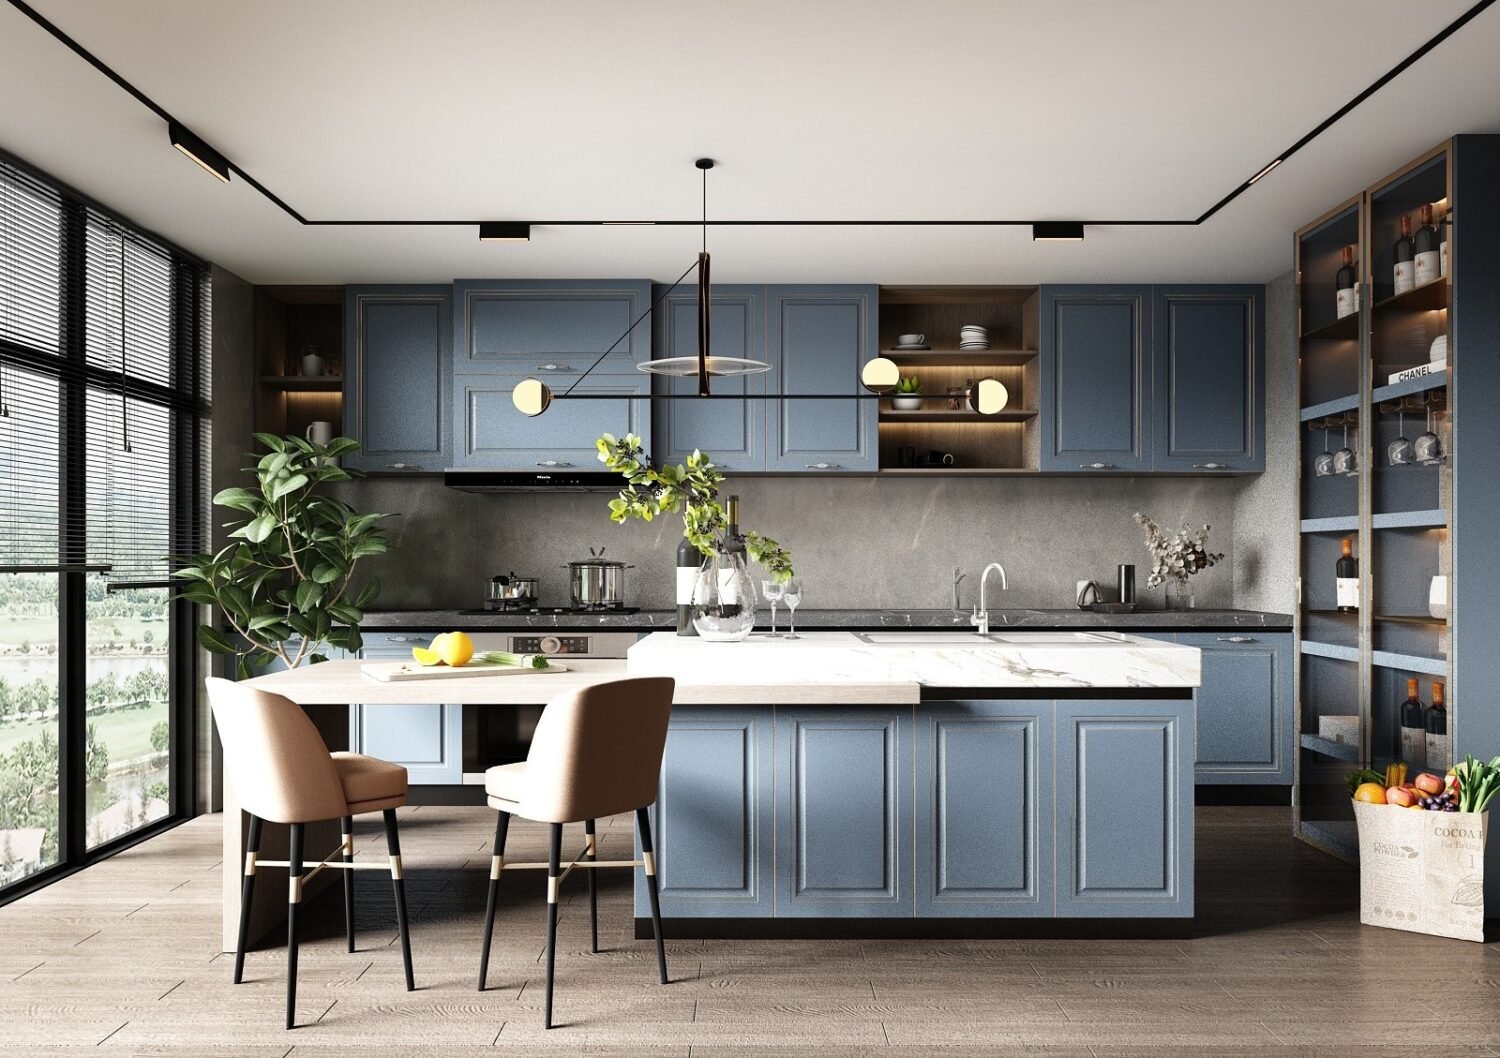
The journey to a dream kitchen begins long before the first cabinet is installed or the first tile is laid. It starts with a vision, and increasingly, that vision is being brought to life through 3D visualization. This technology has revolutionized how we approach kitchen modeling design, offering unparalleled benefits for designers and homeowners.
Why accept 3D modeling for your kitchen project? The advantages are multifaceted, from improved communication to significant cost and time efficiencies. Statistically, the impact is undeniable: 3D kitchen visualization can increase customer engagement by up to 70% and improve conversion rates by 15-20%. These figures underscore the transformative potential of seeing your future kitchen in vivid detail.
Unlike traditional 2D floor plans or sketches, a 3D model provides an immersive, dynamic representation of the space. It allows a comprehensive understanding of scale, proportion, and how different elements interact, virtually eliminating guesswork. This level of clarity is crucial for making informed decisions and ensuring that the outcome aligns perfectly with expectations.
Improved Communication and Decision-Making
One of the most significant benefits of 3D kitchen modeling is its ability to bridge the communication gap between designers and clients. When presenting a design, a photorealistic 3D model speaks volumes more than abstract drawings. Clients can virtually “walk through” their new kitchen, experiencing the layout and ambiance firsthand. This interactive experience fosters a deeper understanding and allows for immediate feedback.
Imagine experimenting with different countertop materials, backsplash styles, or cabinet finishes. With 3D modeling, these changes can be made in real-time, allowing for instant visualization of various options. This risk-free exploration empowers homeowners to make confident choices about aesthetics and functionality without committing to expensive physical samples or potential rework. It validates design concepts, ensuring that every element, from the flow of traffic to the placement of appliances, contributes to the overall vision. For inspiration on diverse kitchen styles and layouts, platforms like Houzz offer many ideas that can be translated into a 3D model.
Cost and Time Efficiency
Beyond aesthetics and communication, 3D kitchen modeling is a powerful tool for managing project costs and timelines. By carefully planning every detail in a virtual environment before construction begins, we can identify potential issues or design flaws. This proactive approach helps avoid costly mistakes, often arising from misinterpretations or unforeseen conflicts during the build phase.
Accurate material estimates are another key advantage. A detailed 3D model allows for precise calculations of cabinet dimensions, countertop square footage, and flooring requirements, leading to more accurate budgeting and less material waste. This streamlined planning process directly contributes to project timelines, helping to keep renovations on schedule. The statistics reinforce this: homeowners who use kitchen design software are 50% more likely to complete their renovation projects on time and within budget. This financial prudence is more critical than ever, with many homeowners postponing projects due to economic concerns. Utilizing tools like the KraftMaid Kitchen Visualizer can further aid in this precise planning.
Getting Started: The Essential Steps of Kitchen Modeling
Starting on a kitchen modeling design project, especially with user-friendly software like SketchUp, can be an enriching experience. It transforms the abstract idea of a new kitchen into a tangible, interactive blueprint. Let’s walk through the essential steps in bringing your kitchen design to life in a 3D environment.
Step 1: Building the Digital Foundation
The first crucial step is to create the digital shell of your kitchen space. This involves accurately translating your physical room dimensions into the software. Start by drawing the floor plan, ensuring precise measurements of walls, corners, and existing structural elements. Once the 2D footprint is complete, you’ll extrude these walls upwards to define the room’s height.
Next, accurately place all architectural openings, such as windows and doors. Please pay attention to their exact positions, sizes, and heights from the floor. This foundational work is paramount; any inaccuracies here will ripple through the entire design. Many online planners, like the IKEA Kitchen Planner, offer intuitive interfaces to help with this initial room layout, allowing you to easily define your space before adding components.
Step 2: Sourcing and Importing 3D Components
Once your room is established, it’s time to populate it with kitchen elements. You don’t have to model every single item from scratch. A significant advantage of 3D modeling software like SketchUp is access to vast pre-designed 3D models and component libraries. The SketchUp 3D Warehouse is an invaluable resource, offering millions of user-generated and manufacturer-provided models, including:
- Cabinet Models: Base cabinets, wall cabinets, tall cabinets, pantry units, and island components.
- Appliance Models: Refrigerators, ovens, cooktops, dishwashers, and microwaves.
- Fixture Models: Sinks, faucets, and lighting fixtures.
- Decorative Elements: Stools, decor, and even small appliances.
When sourcing components, look for well-built, accurately scaled models with a manageable polygon count to keep your model running smoothly. Learning how to steer and import from the 3D Warehouse effectively is a key skill for efficient kitchen modeling.
Step 3: Arranging and Customizing Cabinetry
With your room defined and components at hand, the next step is to arrange your cabinetry. This is where the core of your kitchen layout takes shape. Begin by placing base cabinets along the walls, considering the “work triangle” principles (which we’ll discuss in the next section). Then add wall units, ensuring they are at appropriate heights above the countertops. Tall cabinets and pantry units can be integrated to maximize storage and create a seamless look.
Effective arrangement involves:
- Spacing and Alignment: Ensure consistent gaps between cabinets and proper alignment with walls and appliances.
- Corner Solutions: Use specialized corner cabinets to make the most of often-underused space.
- Customization: Many cabinet models from the 3D Warehouse or specialized libraries allow for dimensions, door styles, and finishes to be customized. In SketchUp, you can use the “make unique” feature to modify individual components without affecting others. Extensions like Profile Builder 4 can be beneficial for adding detailed trim and molding, allowing you to apply complex profiles to your cabinetry quickly.
Step 4: Visualizing Key Design Elements
After the main cabinetry is in place, you can apply materials and textures to visualize the aesthetic details. This step truly brings your design to life and allows for experimentation with finishes.
- Countertop Materials: Apply textures for granite, quartz, marble, butcher block, or laminate. See how different colors and patterns complement your chosen cabinets.
- Backsplash Styles: Experiment with subway tiles, mosaic patterns, slab backsplashes, or painted finishes.
- Lighting Fixtures: Place pendant lights over islands, under-cabinet lighting, and recessed ceiling lights. Observe how different lighting schemes affect the mood and functionality of the space.
- Hardware Selection: Add pulls and knobs to cabinets and drawers. This small detail can significantly impact the overall style.
- Flooring: Complete the visual by applying wood, tile, or vinyl textures.
Software like SketchUp facilitates this visualization by allowing you to import image textures and apply them directly to surfaces. You can easily swap out materials to compare different looks, helping you make confident decisions about your finishes.
Achieving a Functional and Aesthetically Pleasing Layout
A beautiful kitchen is only truly successful if it’s also functional. Kitchen modeling design goes beyond mere aesthetics; it’s about creating a space that improves daily life. The goal is to achieve a layout that is both efficient for cooking and entertaining, and pleasing to the eye.
The Kitchen Work Triangle and Zone-Based Design
At the heart of functional kitchen design is the “work triangle,” a time-tested principle that connects the three primary workstations: the sink, the stove (cooktop/oven), and the refrigerator. The idea is to minimize the distance between these points, creating an efficient food preparation, cooking, and cleaning flow. Ideally, each leg of the triangle should be between 4 and 9 feet, with the total perimeter not exceeding 26 feet.
Modern kitchen design often expands on this concept with “zone-based design.” This approach divides the kitchen into distinct areas based on activity:
- Prep Zone: There is ample counter space for chopping and mixing near the sink.
- Cooking Zone: Centered around the stove and oven, often with adjacent counter space for plating.
- Cleaning Zone: Focused on the sink and dishwasher.
- Storage Zone: Pantries and refrigerators.
- Serving Zone: Often near a dining area or island.
By carefully considering these zones within your 3D model, you can optimize workflow, reduce unnecessary movement, and ensure that every item has a logical place. This thoughtful planning helps avoid bottlenecks and creates a harmonious environment.
Space Planning for Functionality and Aesthetics
Beyond the work triangle, practical space planning involves a holistic view of the kitchen, balancing open space with necessary components.
- Clearance Requirements: Ensure adequate clearance around islands, between opposing countertops, and in front of appliances (especially oven and dishwasher doors) to allow for comfortable movement and safe operation.
- Appliance Placement: Think about how appliances will be used. For example, placing the microwave near the refrigerator can create an efficient snack station. Consider built-in options to create a more streamlined look.
- Island and Peninsula Considerations: Islands and peninsulas can add valuable counter space, storage, and seating. In your 3D model, experiment with different sizes and orientations to see how they impact traffic flow and overall aesthetics.
- Maximizing Storage: Use every available inch with smart storage solutions, such as pull-out pantries, deep drawers, corner cabinet organizers, and vertical storage.
- Balancing Open Space: While maximizing storage is essential, avoid overcrowding. A well-designed kitchen also incorporates open spaces to prevent a cramped feeling and allow for visual breathing room.
Standard kitchen layouts to consider in your modeling:
- L-Shape: Ideal for smaller to medium-sized kitchens, offering continuous counter space.
- U-Shape: Provides the most counter and storage space, which is excellent for larger kitchens.
- Galley: Efficient for narrow spaces, with two parallel walls of cabinets and appliances.
- Island/Peninsula: Can be integrated into L-shape or U-shape layouts to add functionality and seating.
By carefully planning these elements in your 3D model, you can ensure that your kitchen is not only visually appealing but also a joy to cook in and live in.
From Model to Reality: Advanced Techniques for Expert Kitchen Modeling Design
Once the foundational layout and basic elements are in place, the true artistry of kitchen modeling design comes to the forefront. This stage involves refining the model, producing high-quality visuals, and ensuring the digital design translates seamlessly into a practical, real-world construction.
Creating Photorealistic Renderings for Presentation
While a basic 3D model provides a good understanding of space, photorealistic renderings lift the presentation to an entirely new level. These images simulate real-world lighting, materials, and textures, making the virtual kitchen almost indistinguishable from a photograph. This is crucial for client presentations, allowing them to visualize the final product accurately.
To achieve this, designers often use rendering software or plugins integrated with their 3D modeling tool, such as V-Ray for SketchUp. Key steps include:
- Lighting Setup: Carefully placing virtual lights to mimic natural daylight, artificial overhead lighting, task lighting, and accent lighting. The interplay of light and shadow dramatically impacts the mood and realism.
- Applying Realistic Materials: We assign high-resolution textures and material properties (reflectivity, roughness, transparency) to every surface , from polished granite countertops to textured wood cabinets and gleaming stainless steel appliances.
- Camera Angles: Choosing strategic camera positions and focal lengths to highlight key design features and create compelling compositions.
- Post-Production: Minor contrast adjustments, color balance, and sharpness in image editing software can further improve the realism.
The result is a set of images that showcase the design and evoke emotion and excitement. Furthermore, using virtual reality (VR) in kitchen design can lead to a 30% increase in customer satisfaction, offering an immersive walkthrough experience beyond static images.
Advanced Tips for Experienced Designers
For those looking to push the boundaries of their kitchen modeling skills, several advanced techniques can significantly improve efficiency and design quality:
- Custom Component Creation: Instead of relying solely on downloaded models, experienced designers can create their library of custom, parametric components (e.g., cabinets that automatically adjust dimensions). This ensures consistency and allows for unique design elements.
- Dynamic Components: In SketchUp, dynamic components are intelligent objects that can be easily manipulated and configured. Imagine a cabinet component where you can input dimensions, door styles, or material options, and it updates automatically.
- Using Extensions: Beyond rendering plugins, many extensions (like the aforementioned Profile Builder 4 for complex moldings) can automate repetitive tasks, improve modeling accuracy, and add specialized functionalities.
- Layer Management: Organizing your model with a robust layer system (e.g., separate layers for walls, base cabinets, wall cabinets, appliances, lighting) is crucial for complex projects. It allows for easy visibility control and efficient editing.
- Creating Construction Documents: Advanced users can leverage their 3D models to generate detailed 2D plans, elevations, and sections, which are essential for contractors and builders. This ensures that the design intent for fabrication and installation is clearly communicated.
Ensuring Practicality and Adherence to Building Standards
A stunning 3D model is only valuable if it can be built in the real world. This means considering practical constraints and adhering to local building codes and standards.
- Real-World Constraints: Account for existing plumbing lines, electrical outlets, HVAC vents, and structural beams that cannot be easily moved.
- Building Codes: Ensure your design complies with local regulations regarding clearances, ventilation, electrical outlets, and accessibility. For example, minimum distances between a cooktop and an overhead cabinet, or specific requirements for GFI outlets near water sources.
- Electrical and Plumbing Placement: Mark your model’s locations for outlets, light switches, and plumbing rough-ins. This helps coordinate with electricians and plumbers before they even step on site.
- Ventilation Requirements: Plan adequate ventilation above cooking surfaces, considering hood size and ducting routes.
For complex projects or when navigating intricate building codes, consulting professionals who provide Expert kitchen modeling design services ensure compliance and real-world feasibility. These experts can review your 3D models, offer invaluable insights into constructability, and help translate your digital vision into a safe, functional, and compliant physical space. Their experience with construction management and architectural design ensures that your beautiful model is a practical blueprint for success.
Frequently Asked Questions about Kitchen Modeling Design
We often encounter common questions from homeowners and aspiring designers about the nuances of kitchen modeling design. Here, we address some of the most pressing concerns.
What are common pitfalls when using pre-made 3D models?
While the SketchUp 3D Warehouse and other online libraries offer a treasure trove of pre-made models, they come with potential challenges. Common pitfalls include:
- High Polygon Counts: Some models are overly detailed, leading to large file sizes and slow performance, especially on less powerful computers.
- Incorrect Scale: Models may not be accurately scaled, requiring tedious adjustments to fit your design.
- Poorly Grouped Geometry: Components might not be grouped appropriately or made into components, making them difficult to select, move, or modify.
- Hidden Layers or Geometry: Some models may contain hidden elements that clutter your model or cause rendering issues.
- Lack of Detail or Customization: While visually appealing, some models may not offer the customization needed for your specific design.
It’s always a good practice to inspect downloaded models, simplify them if necessary, and ensure they are well-organized before integrating them into your main design.
How does 3D modeling help homeowners stay on budget?
3D modeling is a powerful ally in budget management. By visualizing every detail of your kitchen design, you can:
- Accurate Material Selection: Experiment with different materials and finishes in the model to see their visual impact before purchasing. This allows you to select options that fit your budget without sacrificing aesthetics.
- Precise Quantity Estimates: A 3D model’s detailed nature enables precise calculations for materials like cabinetry, countertops, flooring, and tiles. This minimizes waste and helps secure accurate quotes from suppliers and contractors.
- Preventing Costly Changes: Identifying design flaws or undesirable aesthetics in the virtual space prevents expensive changes during construction. It’s far cheaper to move a virtual wall than a physical one.
- Informed Decision-Making: With a clear visual, homeowners can make confident decisions, reducing indecision that can lead to project delays and cost overruns.
As we noted earlier, homeowners who use kitchen design software are 50% more likely to complete their projects on time and within budget, highlighting the direct financial benefits of this approach.
Can I use this software for smaller projects besides full kitchens?
Absolutely! The principles and benefits of 3D modeling design extend far beyond complete kitchen renovations. The same software and techniques can be effectively applied to a variety of smaller projects, such as:
- Bars: Designing custom home bars, wet bars, or coffee stations.
- Laundry Rooms: Planning efficient layouts for washers, dryers, sinks, and storage.
- Bathroom Vanities: Customizing vanity sizes, countertop materials, and storage solutions.
- Custom Built-in Storage Units: Designing bookshelves, entertainment centers, or mudroom lockers.
- Wardrobes and Closets: Optimizing space for clothing, shoes, and accessories.
For any project where spatial planning, material visualization, and component placement are critical, 3D modeling is invaluable for precise design and confident decision-making.
Conclusion
The evolution of kitchen modeling design has transformed the renovation process from abstract sketches to vivid, interactive 3D experiences. We’ve explored the immense benefits, from improved communication and decision-making to significant cost and time efficiencies that empower homeowners to stay on budget.
From building the digital foundation of your kitchen to sourcing components, arranging cabinetry, and visualizing key design elements, each step in the 3D modeling process contributes to a comprehensive and accurate representation of your future space. We’ve also dug into the critical aspects of achieving a functional and aesthetically pleasing layout, emphasizing the timeless “work triangle” and modern zone-based design principles.
For those seeking to master the craft, advanced techniques like photorealistic rendering and the strategic use of extensions offer pathways to professional-grade presentations and highly optimized designs. Crucially, ensuring practicality and adherence to real-world building standards is paramount, solidifying the bridge between a beautiful model and a successful construction project.
The future of kitchen design is undoubtedly rooted in this powerful visualization technology. It empowers both designers to articulate their vision with clarity and homeowners to start on their renovation journeys confidently. Don’t just dream of your perfect kitchen; bring it to life in 3D. Start planning your kitchen modeling design today, and turn your vision into a stunning reality.


